If you’re like me, the word “carburetor” might sound intimidating at first. It’s one of those parts that seems complicated but really isn’t once you understand what it does. Here’s the good news: knowing how to clean a carburetor isn’t as scary as it sounds. Trust me, if I can do it, so can you. All you need is a little patience, the right tools, and a willingness to get your hands dirty. By the end of this guide, you’ll feel like a carburetor-cleaning pro – and your car will thank you for it!
Why I Decided to Clean My Carburetor?
It all started on a chilly morning when I fired up my car and noticed it wasn’t running quite right. The engine sputtered like it was still waking up, and every time I stopped at a light, it felt like it might stall out completely. At first, I shrugged it off – hey, cars have their moods too, right? But when the rough idling turned into jerky acceleration, I knew I had to do something. A quick chat with a friend (and a little online sleuthing) led me to the culprit: a dirty carburetor.
The carburetor is basically the heart of your car’s fuel system, mixing air and fuel in just the right ratio to keep your engine purring like a kitten. When it gets clogged with gunk and debris – usually from old fuel or dirt – it can mess up that delicate balance and cause all sorts of issues like stalling, misfiring, and poor performance.

What Is a Carburetor and Why Clean It?
Think about it this way – the carburetor’s job is to whip up the perfect mixture of air and fuel and deliver it to the engine to keep things running smoothly. Too much fuel, and the engine floods; too much air, and it runs lean. The carburetor ensures your car has the power it needs without wasting fuel.
While modern cars often use fuel injection systems, carburetors are still common in older vehicles and some smaller engines, like those in motorcycles or lawn equipment. If you’re driving a classic car, chances are you’re dealing with a carburetor – and keeping it clean is key to keeping your ride roadworthy.
Symptoms of a Dirty Carburetor
Over time, dirt, varnish from old fuel, and other debris can clog up the tiny passages inside the carburetor, throwing off that perfect air-fuel balance. When this happens, you might notice:
- Rough idling: Your engine struggles to stay running when stopped.
- Stalling: It cuts out unexpectedly, especially at low speeds.
- Poor acceleration: The car hesitates or lurches when you hit the gas.
- Reduced fuel efficiency: You’re spending more at the pump without extra miles to show for it.
- Hard starting: It takes forever to get the engine going, even on a good day.
If any of these sound familiar, a dirty carburetor might be to blame.
The Risks of Neglecting This Part
Ignoring a dirty carburetor can lead to bigger headaches down the road. Left unchecked, the build-up can damage internal components, forcing you to replace the carburetor entirely – a costly and avoidable repair. Worse, it can cause engine performance to deteriorate, leading to safety issues if your car stalls at the wrong time.
Cleaning your carburetor isn’t just about fixing current problems – it’s about preventing future ones. By taking the time to clean it now, you’re saving yourself from more expensive and time-consuming repairs later. Plus, your engine will thank you with better performance and reliability.

Tools and Supplies You’ll Need
Before diving into cleaning your carburetor, it’s important to gather everything you’ll need. Trust me, having the right tools handy makes the job so much smoother – and saves you from scrambling mid-task. Here’s what you’ll need:
- A set of flathead and Phillips screwdrivers for removing screws and clamps.
- Carburetor cleaner spray is your main weapon against grime and varnish. It’s designed to break down stubborn deposits without damaging the carburetor.
- Gloves to protect your hands from grease, fuel, and chemicals. Disposable nitrile gloves work great.
- Rags or shop towels for wiping down parts and catching spills. Have plenty on hand!
- Parts tray or Ziplock bags to keep track of small screws, springs, and other components. Nothing kills the mood faster than losing a tiny part.
If you want to be extra prepared, a wrench set can help loosen stubborn bolts, while compressed air is great for blasting debris out of tight spots. It’s also a good idea to have a gasket kit on hand, just in case the carburetor’s gaskets need replacing during the process.
Pro tip: I always grab an old toothbrush – it works wonders for scrubbing without scratching delicate parts. Plus, it’s oddly satisfying to see the grime melt away with a few strokes!

Step-By-Step Guide on How to Clean a Carburetor
Knowing how to clean a car carburetor might seem complicated, but breaking it down into simple steps makes the process much more manageable. Whether you’re a seasoned DIYer or a first-timer, this guide will walk you through everything you need to know to get this part sparkling clean and your engine running smoothly. Let’s dive in!
Step 1: Preparation
Before you start, park your car in a well-ventilated area, preferably outdoors or in a garage with good airflow. This is important because you’ll be working with fuel and cleaner sprays (such as NORTHWEST ENTERPRISES Ultrasonic Cleaner Solution), both of which can produce fumes. Next, gather all your tools and supplies so you’re not scrambling mid-task. Lay them out within easy reach to keep things efficient.
Finally, for safety, disconnect the car’s battery. This step prevents accidental sparks or electrical issues while you’re working. It’s a simple precaution that can save you from a lot of trouble – better safe than sorry!
Step 2: Removing the Part
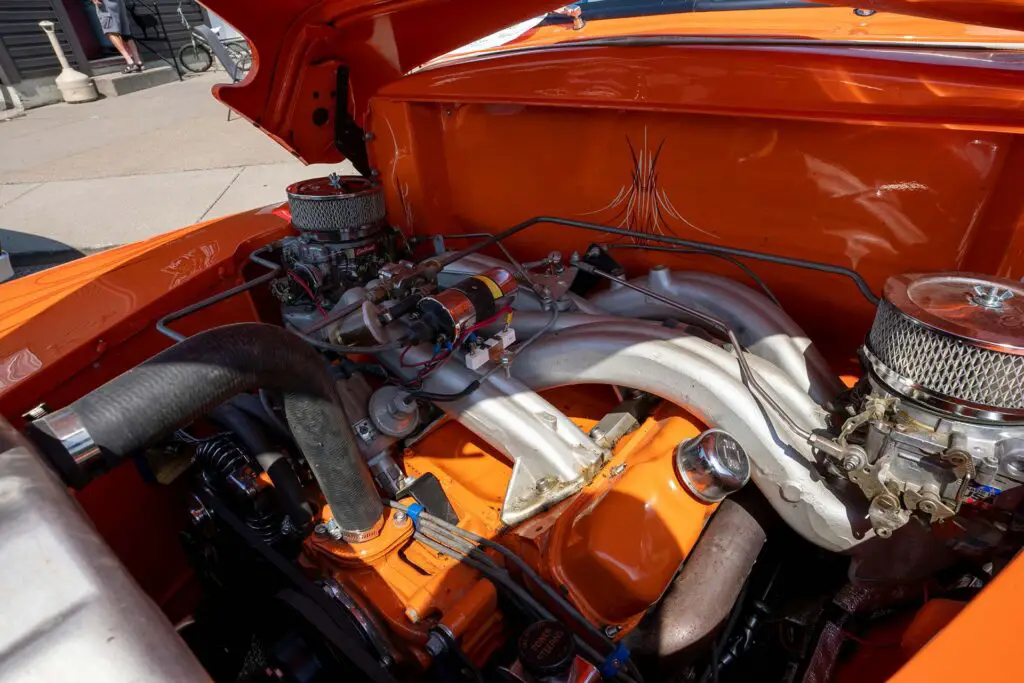
The carburetor is usually mounted on top of the engine, right above the intake manifold. If you pop the hood and see something that looks like a small metal maze with hoses and cables connected to it, you’ve found it! For older cars, it’s often directly under the air filter housing, so you may need to remove that first. Once you’ve located the part in question, it’s time to start the removal process:
- Unscrew or unclip the air filter cover and lift it off to expose the carburetor. Set it aside with the filter.
- Use masking tape or take a quick photo to keep track of where each hose connects. Trust me, this step will save you from a major headache when it’s time to reassemble.
- Carefully detach the fuel line using a wrench or pliers, and be prepared for a small amount of fuel to leak out. Keep a rag handy to catch spills.
- Remove the throttle and choke cables, making a mental note (or another photo) of how they’re connected.
- Use a wrench or socket to unbolt the carburetor from the manifold. These bolts might be a bit stubborn, so apply steady pressure and don’t rush.
Once the part is free, lift it out gently and place it on a clean surface. Congrats, you’ve completed one of the trickiest steps! Now the fun part – cleaning – begins.
A little humor from the garage: Here’s where things can get… interesting. The first time I did this, I dropped a bolt straight into the engine bay. After 10 minutes of fishing it out with a magnet, I learned my lesson: always work carefully and use a parts tray for small items! Also, if a bolt won’t budge, a little penetrating oil and patience work wonders.
Step 3: Initial Cleaning
Before diving into the nitty-gritty, give the outside of the part a good wipe-down. Use a rag and some specialized cleaner to remove dirt, grease, and grime. This prevents debris from falling inside during disassembly. Trust me, this simple step saves a ton of headaches later!
Step 4: Disassembly
Now, carefully take the carburetor apart. Remove screws, jets, and small components one at a time. Use labeled bags or take photos to keep track of what goes where. It’s like a puzzle – you’ll thank yourself for staying organized when it’s time to reassemble.
Step 5: Deep Cleaning
With everything disassembled, it’s time for the deep clean. Spray the cleaner generously into all openings and scrub with your trusty toothbrush to remove stubborn deposits. Pay special attention to jets, needles, and float bowls. Funny enough, this is where my toothbrush really shines – literally!
Step 6: Reassembly
Once everything is spotless, start putting the carburetor back together. Follow your photos or notes carefully and ensure every part moves freely and seals correctly. Skipping steps here can lead to frustrating do-overs – learn from my mistakes!
Step 7: Reinstalling
Reinstall the carburetor by reconnecting the hoses, cables, and bolts in reverse order. Take your time and double-check every connection – trust me, you don’t want to realize you missed something after starting the engine!

Testing the Reinstalled Part
With the carburetor reinstalled, it’s time to see if all your hard work paid off. Reconnect the battery and start the car. Listen for smooth idling – no sputtering, stalling, or uneven revs. If the engine runs like a dream, you’re almost there!
If things feel a little off, you may need to adjust the air-fuel mixture screws. Use a screwdriver to fine-tune the balance until the engine hums steadily. Don’t worry – small adjustments go a long way. When I first heard my car purring like it just came out of the showroom, I couldn’t help but grin. Hearing that smooth hum? That’s the sound of success – and it’s oh-so-satisfying!
Pro Tips for Good Maintenance
To keep your carburetor running smoothly and avoid frequent cleanings, a little preventive care goes a long way. Here’s what you should do:
- Cheap, low-quality fuel can leave behind deposits that clog the carburetor. Opt for trusted brands to minimize build-up.
- A fuel additive every few fill-ups can help dissolve gunk and keep the fuel system clean.
- If you let the car sit for long periods, the fuel can degrade and cause varnish in the carburetor. Starting the engine occasionally helps prevent this.
- A dirty air filter allows debris to enter the carburetor, so check and replace it as recommended by your car’s manual.
Following these simple tips can save you from having to scrub your carburetor as often – and your car will thank you for it!

You Did It!
Cleaning a carburetor might sound pretty stressful at first, but with the right tools and a little patience, it’s totally doable. From preparation and disassembly to deep cleaning and reinstallation, you’ve got this! Remember, the key is staying organized and taking your time.
For first-timers, don’t stress too much – just follow the steps, and you’ll feel like a pro of knowing how to clean a carburetor on a car. It feels good to take charge of your car’s health, doesn’t it? Trust me, there’s nothing more satisfying than hearing your engine run smoothly after all that hard work. Happy wrenching!


