The car ceiling, also known as the headliner, is an area that is frequently overlooked when cleaning the interior of a vehicle. Without proper care, it would eventually collect dirt and stains, so ensure you learn how to clean a headliner adequately. Otherwise, your vehicle could lose its squeaky clean appeal and it could appear older and well-used.
Most people think that headliners aren’t supposed to be cleaned since they don’t get in direct contact with passengers. Well, you should think twice, because after a while you could notice the surface actually got dirty. Some minor stains could just require simple wiping with a cloth and a fabric cleaner. For tougher or larger stains with odor, spray the whole headliner’s surface with the cleaning product and gently rub it. A steam cleaner is also required to clean a filthy headliner.
What Are Headliners and Why It’s Important to Know How to Clean Them?
Before we get to the cleaning part, it’s best to first look at what the headliners are made of. This is significant because it influences the cleaning supplies you will use. After all, when you have to change a flat tire, or just change winter or summer tires, you don’t just do it, but you prepare for the process first.
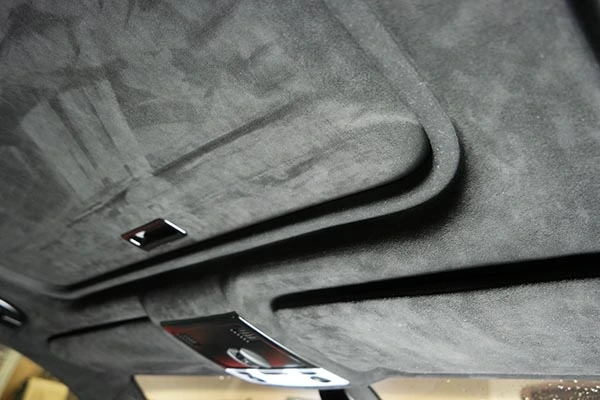
The majority of headliners are made in a single piece. That is, if it is damaged, you must replace it entirely. There are no detachable or replaceable parts. And most of them are made up of three different layers of material:
- A foam layer that sits directly on top of the metal roof and aids in sound deadening and insulation.
- A layer of fiberglass or cardboard is formed as the roof to serve as a backing material.
- The final section that is attached is typically made of fabric, vinyl, or leather. Although leather and vinyl are no longer that common, if you have them, consider using adequate cleaning supplies that will not harm the material.
The vehicle’s ceiling should be cleaned as part of your annual or semi-annual car detailing. You can save money by doing it yourself instead, but the best way to clean a vehicle headliner depends on its condition. Although there are various methods for cleaning vehicle headliners, all should be done with care to avoid damage.
What’s the Main Purpose of Headliners?
A headliner is important for a number of reasons, but the most important one is to protect passengers and cover the metal roof. Headliners help to shield the vehicle by keeping it cool as well as hot air inside. As a result, the effect of the turned AC on will be more noticeable.
Most modern cars also include a foam layer that dampens vibrations and reduces noise inside. So, if you have the impression that your vehicle is very silent while working, this is due in part to the headliners. Then there’s the aesthetic consideration, too – a sleek finishing touch. Without them, the roof would be bare metal.
If you’re looking for one of the best cars for women that are used, check whether the previous owner cleaned the vehicle of dog hair, replace or clean the seat belts, take care of the dashboard and clean the steering wheel.
However, in most cases, only those who have properly cared for and maintained their vehicle over the years will recall cleaning the interior roof. As a result, this could be a great hint of the car’s current condition and age.
Before you begin driving at night or day, you should thoroughly familiarize yourself with all of the vehicle’s components. Unless you drive a cabrio, your four-wheeler will almost certainly have a headliner. When purchasing a used car, a quick look at the roof can reveal a lot about the maintenance and general condition of the car.

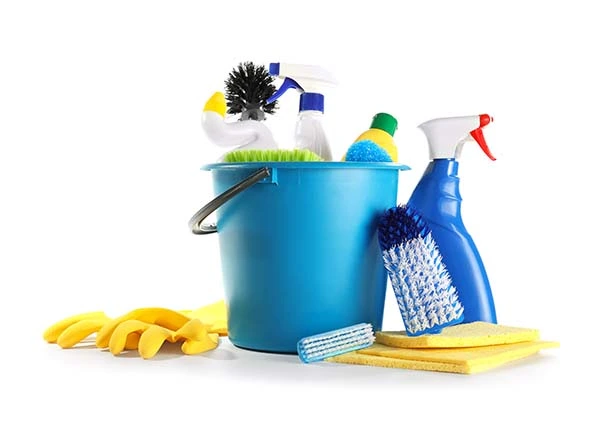
Before the Cleaning Part, Ensure You Get All the Right Supplies
Cleaning products for a headliner range from a simple piece of cloth to a large cleaning machine known as a steam cleaner. Check out what tools you’ll need for this process.
Check Out the Guide on How to Clean a Headliner
There are three methods for cleaning a headliner. To figure out which is the best way for you is to determine the condition of your vehicle’s roof. Since it’s typically made of soft foam, followed by a backing material of fiberglass or cardboard covered in fabric, any type of cleaning must be done with caution – liquid and water can cause the headliner to deform or even sag. Having all this in mind, it’s best to wash your headliner using one of three methods – spot, surface, and deep cleaning.
Begin With the Initial Spot Cleaning Step
You probably won’t be shocked to notice a stain or two on the interior of your car roof if you frequently travel bulky goods in it. But you don’t need to use the steam cleaner yet. Instead, you can simply wipe these off with a microfiber cloth and upholstery cleaning.
- Your headliner may have visible dirt. If so, lightly clean the area to get rid of any debris.
- Spray the upholstery cleaner onto the cloth directly, then use a soft cloth to gently wipe the stain or blemish. You don’t want the stain to penetrate the foam if it is only on the surface.
- Use a dry microfiber cloth to blot the area to eliminate extra moisture and fluids.
The mark or stain should be completely gone when the whole interior has completely dried. However, if a spot is still there, move on to the following cleaning technique.
Proceed With Surface Cleaning if There Are More Stains
You can perform a deeper clean if there are several markings or the spot clean wasn’t effective. Roll up your sleeves and be ready to deal with larger surfaces in the most adequate way.
- Spray your headliner well with your Chemical Guys upholstery cleaner.
- If your product has a recommended sitting time, follow that advice.
- Gently brush the fabric with a gentle brush, being sure to reach all sprayed areas.
- If necessary, blot out any excess water with a microfiber cloth and let it air dry.
Most of the time, this should get rid of stains or lingering odors, but if the problem persists, you can undertake a deep clean.
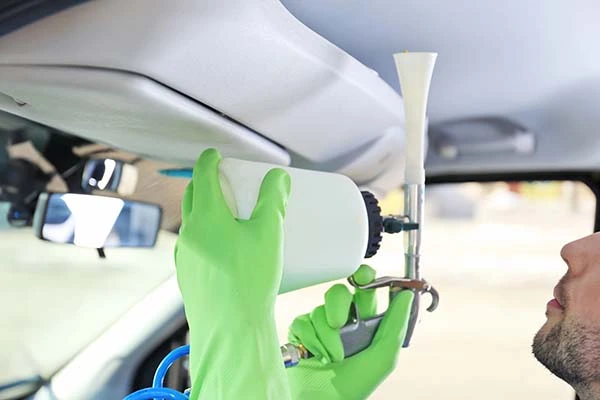
Do the Deep Cleaning if Necessary
Really, only the most urgent situations call for a deep clean because too much heat or moisture might harm the fabric or cause it to sag. To prevent softening the adhesive, it must be done carefully. If it is done poorly, a replacement may be required.
- Follow the directions for using the cleaning products and water to prepare your steam cleaner. It’s best to find out if a certain product needs to be used with your steam cleaner.
- Insert the proper attachment. It should ideally be less substantial and non-abrasive.
- Turn on your steam cleaner, give it a moment to warm up, and then start moving over your headliner.
- In order to prevent oversaturating any one location, try to move rather quickly.
- Before using your automobile again, let it dry. This will ensure the glue dries out and prevent mildew and mold growth.
When you’re taking care of your own, like replacing U-joints or even replacing a valve stem, it’s easy to think that the cleaning part will be a piece of cake. But, you have to be careful when deep cleaning because if not, you might end up ruining your four-wheeler.
Get Rid of Unpleasant Odors and Keep Your Four-Wheeler Fresh
In addition to stains, headliners frequently retain unpleasant odors, and nobody wants that in their car. However, smokers will definitely understand what we’re talking about, therefore we’ve provided a fast recipe for a combination to help you get rid of unpleasant scents. Regular usage of this preventative technique will also hasten the formation of those unattractive smoke stains.
For this quick DIY project, you will need to mix the following ingredients:
- ¼ of white vinegar,
- One cup of water,
- One tablespoon of baking soda,
- A couple of drops of whatever essential oil you prefer for scent,
- A microfiber cloth.
This combination should be added to a spray bottle, then shaken vigorously. Try not to oversaturate the cloth when you spritz the solution on it before using it to gently dab the roof. Applying this combination straight to headliners could saturate them and produce mildew, so avoid doing so. To get rid of any remaining baking soda, vacuum the entire surface after it has dried.
Clean the Inside of Your Car Properly
As you can see, you can maintain the automobile clean and odor-free by learning the many techniques for cleaning the headliner. You would also save money (which is great in this economy) because you wouldn’t need to get the automobile detailed. Simply choose the cleaning method and follow the instructions I left. And your machine will be fresh looking in no time.


