Battery cables represent one of the most crucial parts of a car’s electrical system, despite their simplicity. In fact, knowing how to replace battery cables is something you should think about if you want a completely safe drive. The reason is quite simple – cables are the primary link between the vehicle’s power source (battery) and the electrical systems like starting and charging.
After gathering the right materials, remove first negative and then positive terminals. Remove the battery and all the cables from the engine. Be sure the new cables are the right ones, and then reinstall the battery. Once you learn everything about each step you need to take, you’ll see that replacing battery cables isn’t such a hard thing to do. However, you need to be completely aware that only doing each step carefully and correctly will ensure the success of your work.
Why It’s Important to Learn How to Replace Battery Cables
If you notice that the car battery is worn out, do not wait for it to completely betray you. Luckily, you won’t have to run to the mechanic if this happens to your four-wheeler. The process of replacing the battery cables is quite simple – it consists of removing the battery, installing new cables, and reinstalling the battery.
But will you have to deal with this kind of problem often? Actually, it is not the case. Unless you notice any rust, these cables won’t need to be replaced often. Also, if you notice the vehicle battery light flashes, but nothing actually happens to your four-wheeler, consider it the right time for replacing the cables.
Remember that a car battery could have other problems. Therefore, you must take great care and attention in this situation. Understanding the causes of this kind of issue is crucial; once you know how to tackle it, nothing will go in your way. Understanding why this occurs and attempting to halt it are both essential.
When Do the Vehicle’s Battery Cables Need Replacement?
Taking care of your four-wheeler is essential if you want to have it functioning properly in the long run. This means adding brake fluid, checking the oil regularly, and taking the vehicle to the mechanic.
But, even though you do all the necessary maintenance, some problems can occur. There is no standard for how frequently damaged battery cables should be replaced, unlike oil changes, for example. That’s why you should know when the battery cables need replacement. Check what are the symptoms of bad wires first:
- Dimming of the vehicle’s interior light,
- The engine is slow,
- There’s a clicking noise when starting,
- The vehicle has no electricity.
Be conscious of the warning signs of a bad battery cable, such as a slow or unsuccessful start, dimming lights or interior lights, or stopping while the engine is operating. Make sure to check the battery wiring if you experience any of these symptoms.
What Tools Are Required?
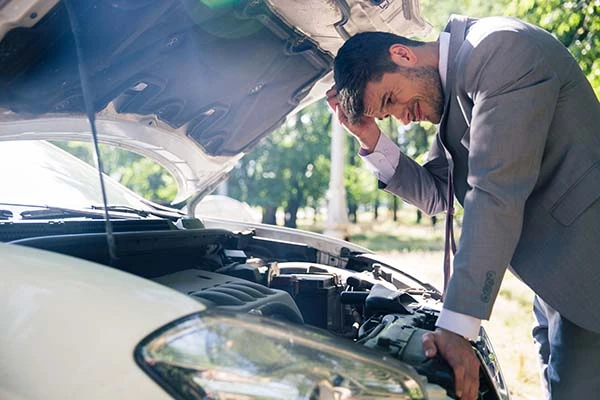
Have you ever questioned why the car battery is blinking and requiring you to locate the closest workshops for a free battery checkup service? The dashboard light that resembles a regular battery with a “+” and “-” symbol on it is probably seen when you press the ignition key but before the car actually starts.
When this happens, you’ll have to check the cords connecting your batteries. Do you see any cracks, holes, burns, corrosion, or brittleness? If so, a problem with your battery wires may exist. Corrosion is typically visible where the cable attaches to the batteries or terminals and can appear as a soft green or white or green powder. This typical consequence of battery use can accumulate and harm your wires by reducing conduction efficiency.
Although it may seem this job can be done in no time without any preparation steps and protective gear, think again. You need to protect yourself whenever you decide to do any kind of mechanical repair – whether you’re changing a tail light or just taking care of the license plate bulb. So, here are some tools you should have:
- Basic tool kit,
- Safety glasses,
- Socket wrench,
- Wire brush,
- Socket extension,
- Wheel chocks,
- Battery cleaner,
- Protective gloves,
- Repair manual,
- Jack with jack stands,
- Diagonal cutters.

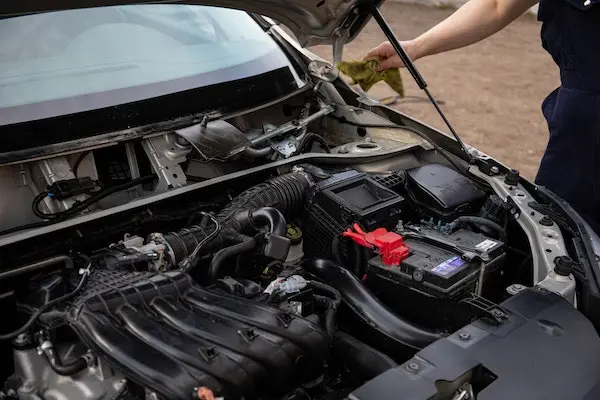
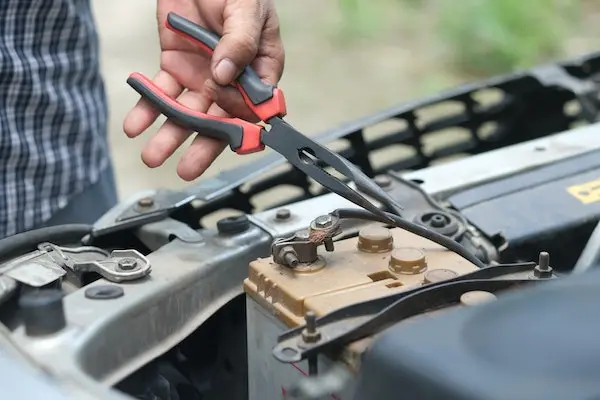
#1 Inspect the Battery Cables
When you suspect something’s wrong with the cables, the first thing to do is to inspect. Carefully check the wires that need to be replaced. Locate the negative and positive wires that go from the engine to the battery. This will also help you identify both cables and ensure adequate replacement (especially if you have the universal version of the wires).
Although this process surely isn’t simple as changing flat tires, or taking care of the vehicle’s inside (cleaning the steering wheel and taking care of the seat belts), it will help you learn many new things about your four-wheeler, which is always a good thing.
Will You Replace the Cables Every Time the Battery Light Flashes?
Simply answered – no, you don’t have to suspect the bad cables every time the battery light turns on on the control panel. Whenever our cars have a problem, the car battery light usually illuminates. It may be something simple or really challenging. Check some of the most common reasons why the battery lights flash:
- Loose battery cable,
- Corroded terminals,
- Bad alternator belt,
- Bad alternator,
- Bad battery.
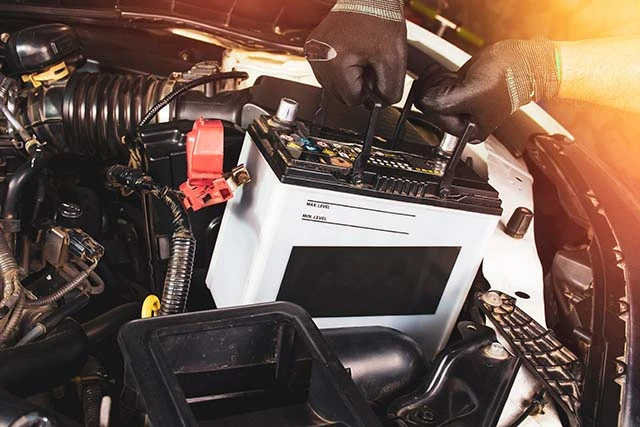
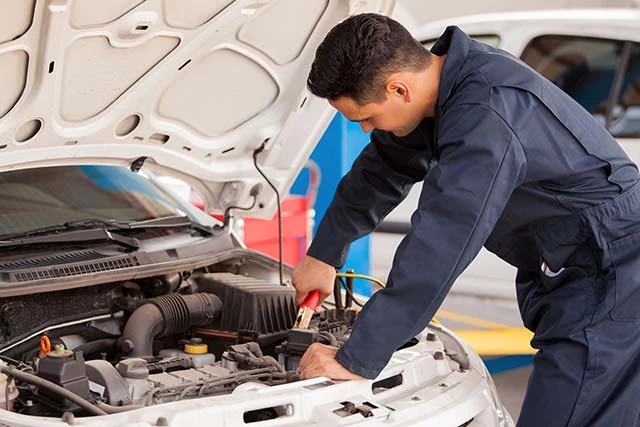
#2 Take Care of the Negative Terminal First and Then the Positive Terminal
After you’ve done all the inspections, it’s time to remove the terminal. The first one to take care of is the negative one. It’s important to do it this way because you’ll ensure the possible electrical shorts and shocks are avoided.
Typically, a black battery wire is on the negative side of the battery. So, after you disconnect it, set aside the defective cable and take care of the positive terminal. Luckily, removing this side of the battery is the same as the negative one.
#3 Separate the Engine and the Battery
When you disconnect the cables (both of them), you should make sure none of the securing mechanisms are left on top or at the base of the battery. Only then can you safely remove it from the engine.
This step could seem like the most challenging one so far for most people. But, those who enjoy watching these mechanics, will know that telling if a water pump is bad or whether a vehicle thermostat isn’t working properly is much harder.
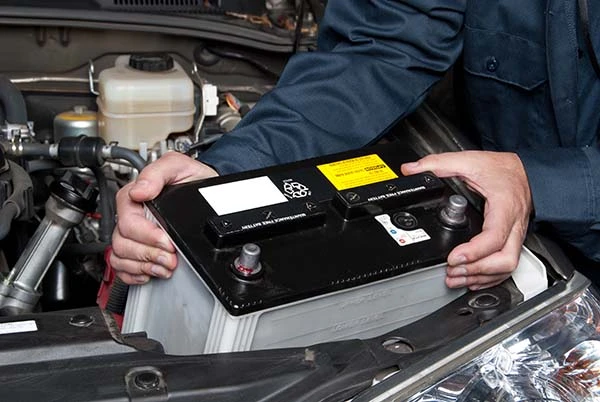
#4 Remove All Cables From the Battery
When you’re doing this for the first time and you manage to safely remove the battery, you’ll probably feel like nothing can stop you now. You might even feel excited to replace valve steam, but before doing all that, ensure you learn about battery disposal first.
After you take out the battery, return to where the two battery wires link to the car and unplug them both. The positive battery cable is typically fastened to the starter or a fuse box, whereas the negative battery cable is typically bolted to the engine or a location on the vehicle’s frame.
#5 Ensure the New Cables Are Compatible
Comparing the current cables with the replacement ones you have surely is something that should not be omitted. So, once the cables are removed, compare them with the new ones because it can easily happen that they aren’t right for your four-wheeler. In order to do it, you have to make sure that cables are practically matching the old ones – check the length and terminal ends and ensure these are matching.
On the other hand, there are also universal cables and if you have those, there will be some more work to do (pretty much the same as when replacing a bad spark plug because you’ll have to ensure they are compatible). So, If you have the universal ones, use the diagonal cutters to shorten them if necessary. Also, don’t forget to thoroughly check both terminals and, if necessary, get the compatible one, as well.
#6 Proceed With Installing the Cables
Even if you’ve never imagined you’ll be replacing automobile batteries, replacing U-joints, or being able to tell if a clutch master cylinder is bad, with the right information, you’ll surely think differently. Surely, considering how vehicle prices are so high, knowing some things you can do on your own will save you the money you would spend on the mechanics.
So, after making sure the replacement cables are compatible with your car, go to replace them the same way they were taken out. The contact surfaces must be free and clear of any debris or corrosion before fastening the wires down and be careful not to overtighten the bolt. Both wires should be fastened to the car, but they shouldn’t yet be connected to the battery.
#7 Reinstall the Battery, Cables and Clean the Terminals
To reinstall the battery, carefully reposition it inside the engine compartment using both hands. After the battery has been connected, scrub both terminals thoroughly with a mixture of baking soda and water. This will ensure the best contact between the terminal and posts because it will remove any left corrosion.
The only thing left to do after cleaning terminals is to reinstall each cable to its proper post. Begin with installing the positive cable and finish with the negative one. After you do this, you’ll feel like nothing can stop you and your four-wheeler, even when driving at night.
Check How to Clean the Battery Connections
Once you did all the hard work of replacing the cables, remember to clean the vehicle battery as well. After all, no special equipment is required to do it, but some images you surely already have at home – baking soda, wire brush, water, and petroleum jelly. It will ensure the proper connection and keep the battery clean. Here’s how the cleaning process should go:
- Both battery terminals should be covered with baking soda,
- Put a little water on each terminal,
- Repeat at the ends of the cable,
- Cleanse the terminals,
- Rinse the terminals,
- Allow the battery to fully dry,
- Cover the battery connections with petroleum jelly.
Complete the Whole Process By Testing the Vehicle
The installation is the final stage of this process. Make sure there is power by turning the ignition switch to the ON position, and afterward start the car to make sure everything is operating as it should. Changing battery cables is typically a pretty straightforward process that requires only a few common hand tools. Driving your four-wheeler requires so much more than your driver’s license, as you can see. But, it definitely shouldn’t stop you from enjoying driving.


