If you’ve ever wondered how to check the coolant level in your vehicle or why it even matters, it’s important to nail this task down to know exactly what’s going on. After all, this is one of those non-negotiable vehicle maintenance chores. Let’s demystify the process, ensuring that the next time you pop the hood, you’ll do so with confidence and ease.
This task starts with parking your four-wheeler safely and letting it cool down. Locating the reservoir and safely removing the cap are the next steps. Assessing the fluid levels is pretty straightforward and can be done with a visual check. If necessary, topping up ensures optimal engine performance. Finally, securing the reservoir cap and conducting a final check wraps up the whole ordeal.
Why Is It Important to Know How to Check the Coolant Level?
The liquid that runs through your vehicle’s radiator plays a pivotal role in keeping the engine’s temperature in check. Sometimes referred to as antifreeze, this fluid absorbs excess heat, ensuring that the internal components of your engine remain cool even during intense operations.
To further emphasize just how important regularly checking and adding coolant is, here’s a sneak peek into what might go south if the levels aren’t up to mark:
- Your vehicle can overheat, leading to breakdowns and potentially severe damage, which results in costly repairs,
- Low levels can result in increased friction and heat, causing wear and tear to the engine components,
- Your four-wheeler might experience reduced efficiency, failing to offer a smooth and reliable ride.
Tools and Materials Needed to Check Car Coolant Levels
While understanding how to check a car’s coolant level is pretty straightforward, ensuring you’ve got the right tools and resources at your disposal before starting makes the task even smoother. So, let’s get you geared up with everything you need to confidently assess your vehicle’s antifreeze status:
| Funnel | Helps in pouring the liquid into the reservoir, avoiding spills |
| Rag or cloth | Used for wiping any spills or cleaning off residue from the reservoir cap |
| Owner’s manual | Provides guidance on the specific type of antifreeze you should use |
| Antifreeze | Needed to top up the levels if found to be low during the check |
Safety First – It Doesn’t Matter if It’s Just a Check
This fluid can get extremely hot, especially if the vehicle has been running down famous US routes or spent some time stuck in stop-and-go traffic in one of the cities with the worst drivers. Because of that, making sure that the four-wheeler is cool and wearing gloves can offer extra protection against splashes.

What Are the Best Coolants for Your Car?
Every modern vehicle has its own unique needs and specifications, and this principle is golden when selecting the right antifreeze. Therefore, always ensure to cross-reference your choices with the owner’s manual to confirm compatibility with your vehicle’s system.
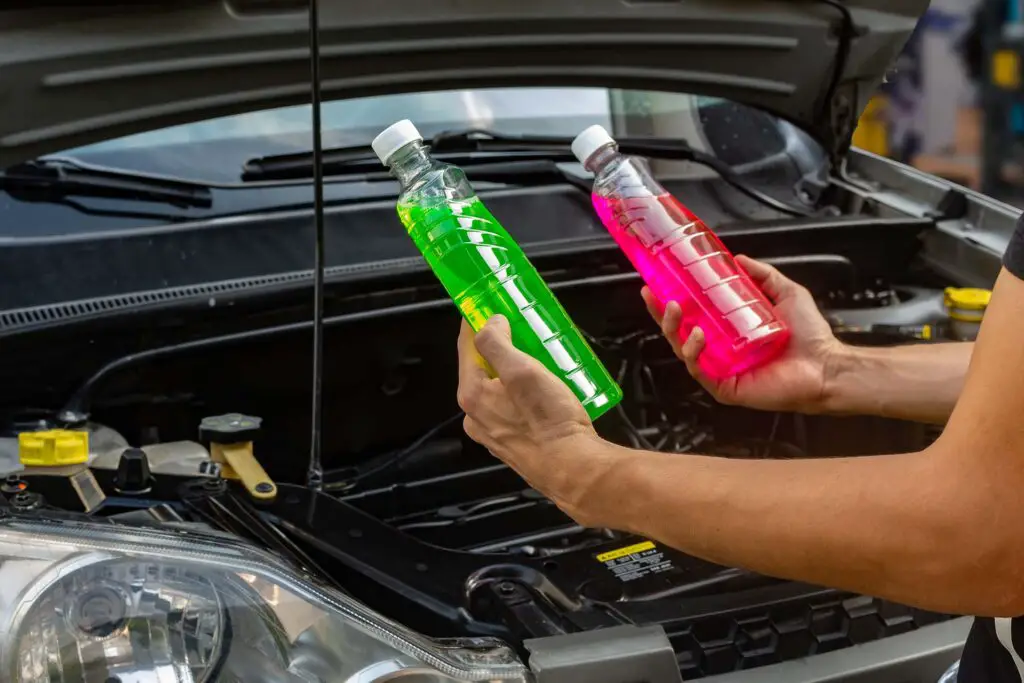
With that pivotal step in mind, let’s explore some top-tier antifreeze products that have garnered accolades for their performance, reliability, and efficiency:
- EVANS High-Performance Waterless Coolant – has a pretty impressive boiling point of 190°C (375°F),
- Prestone Antifreeze Coolant – made by a reputable manufacturer in the industry, it’s a great choice no matter if you own a small city car or a family SUV,
- Zerex Original Green Low Silicate Antifreeze – a high-quality formula that incorporates Organic Acid Technology (OAT).
Step-By-Step Guide on How to Check Coolant Level in a Car
After you pick the best coolant for your four-wheeler, learning how to check its level is fairly straightforward. In a nutshell, the process involves ensuring the vehicle is cool to avoid burns, opening the hood, locating the reservoir, and checking the fluid level against the marked lines on the reservoir. Now, let’s explore each step in detail to make you a pro in no time.
Step 1 – Park Your Car Safely and Prepare It for the Task Ahead
Before diving into the checking process, parking your four-wheeler safely is the first order of business. Choose a level surface and ensure the parking brake is engaged to prevent any unintended movement. It’s also crucial that the vehicle is turned off and allowed to cool down. It’s all about creating a safe, stable environment to work in, minimizing risks, and ensuring an accurate assessment.
Step 2 – Locate the Coolant Reservoir
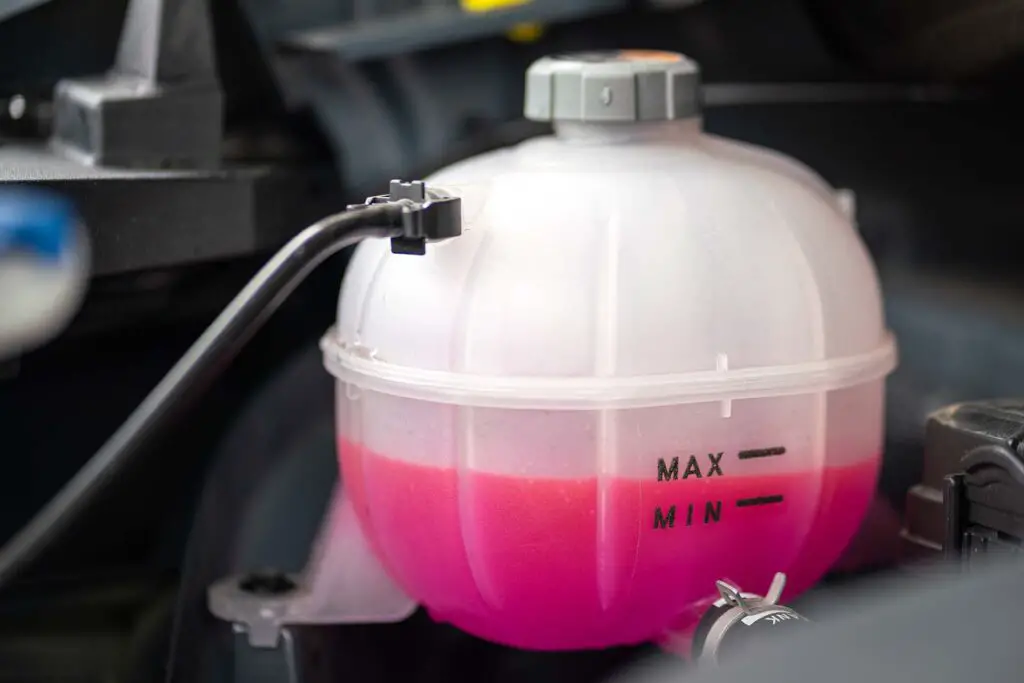
The reservoir is typically a transparent plastic container located near the car’s radiator, making it easier to visually assess the fluid levels. However, the specific location can vary based on the vehicle’s make and model. So, to pinpoint its exact position and avoid any guesswork, it’s always best to consult the owner’s manual.

Step 3 – Removing the Coolant Reservoir Cap
Once you’ve opened the hood and located the reservoir, turn the cap on it counterclockwise, releasing it slowly to allow any built-up pressure to escape safely. Here are some tips to ensure safe handling:
- Always avoid direct contact with your skin and eyes to prevent irritation,
- Have a rag or cloth handy to quickly wipe off any spills or splashes, ensuring the area around the reservoir remains clean,
- If you’re working in a garage or enclosed space, ensure it’s well-ventilated to dispel any fumes effectively.
Step 4 – Check the Coolant Level and Add Some if Necessary
The reservoir typically comes with clear indicators to facilitate an easy and accurate assessment of the fluid levels. These markings are your go-to reference to determine if the levels are low or just right. However, if, for any reason, the indicators aren’t visible or your reservoir lacks them, flipping through the owner’s manual will offer clear guidelines and illustrations to aid in the assessment.
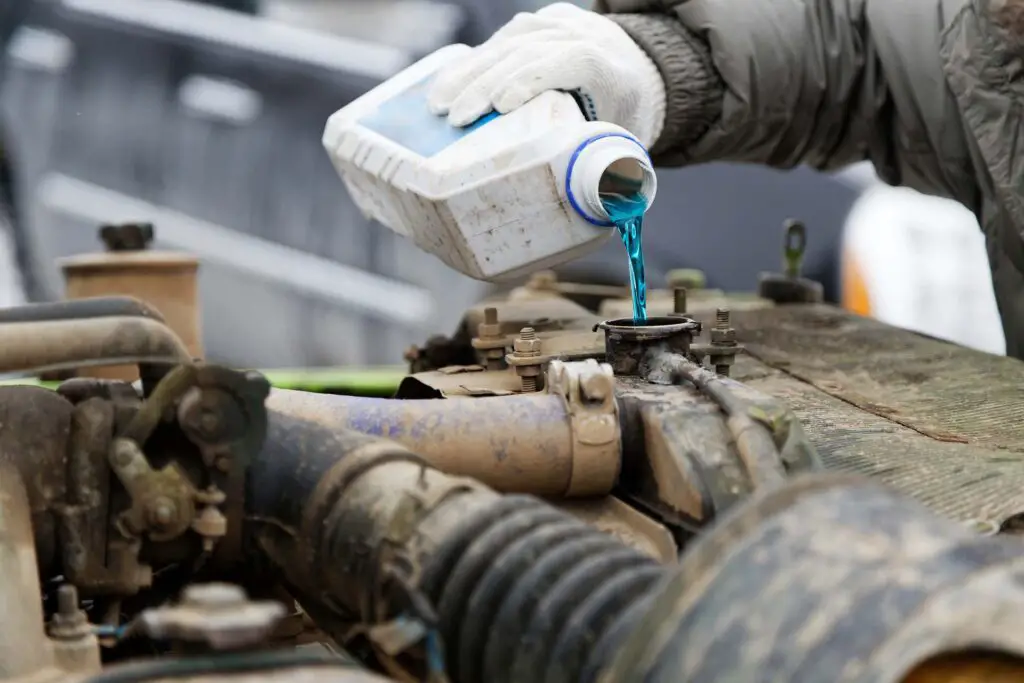
If the liquid levels are found to be wanting, topping it off is a straightforward task. Here are detailed steps to guide you through:
- Place the funnel – insert it into the reservoir opening to facilitate a precise pour and prevent any spills from happening,
- Pour slowly – add the fluid gradually, monitoring the level to ensure it aligns with the recommended markings on the reservoir or as per the manual’s guidelines,
- Clean any spills – wipe away any spills around the area to maintain cleanliness and prevent any potential corrosion or slips.
Step 5 – Replacing the Reservoir Cap
Securing the reservoir cap is a step that might seem simple but is paramount in ensuring the safety and effectiveness of the entire checking and refilling process. Hold the cap firmly and turn it clockwise until it fits snugly, ensuring it’s neither too tight nor too loose.
Step 6 – Final Check
Now that everything is all sealed up, it’s time for one final look. Review the reservoir’s level indicators one more time to confirm the liquid is at the optimal level. Ensure that the cap is secure and that there are no spills or leaks around the area. This final check is your peace of mind that the job has been done thoroughly, and your car is ready to offer optimal performance with a well-maintained thermal regulation system.
Should You Take the Car to the Mechanic or Change the Coolant Yourself?
While many of us are hands-on and ready to dive into maintenance tasks, knowing when to call in the pros is equally important. When it comes to topping off the reservoir, it can definitely be a DIY job for many. However, there are scenarios where the expertise of a mechanic is not just needed but crucial.
Here are some of such situations where a trip to the mechanic would be advisable:
- If your vehicle has a complex cooling system that requires specialized knowledge and tools for maintenance,
- When a complete flush and refill of the system is necessary, which can be a more complicated task requiring professional skills,
- If you are experiencing recurring issues with the temperature regulation system, indicating underlying problems,
- If there are signs of major issues like leaks, overheating, or contamination requiring professional diagnosis and repair,
- Some vehicle warranties require professional service for maintenance tasks to ensure the warranty remains valid.
Wrapping It Up – Your Cool Ride Awaits
We’ve navigated the ins and outs of checking and managing that all-important liquid that keeps our beloved engines from throwing a fit of overheated frustration. As you’ve seen, it’s a task that, with a little care and attention, can be done by any dedicated driver. Here’s to smooth, cool drives and the sweet hum of a happy engine!
Frequently Asked Questions
Can I Mix Different Brands of Coolant?
It’s generally not advisable to mix different brands or types, as they may have different chemical compositions that could react negatively with each other. Always refer to your car’s owner’s manual for specific recommendations and if in doubt, completely flush the system before adding a different type of antifreeze.
How Often Should I Replace the Coolant?
The frequency of changing the antifreeze can vary depending on your car’s make and model. Generally, it’s recommended every 30,000 to 60,000 miles but always check your owner’s manual for the manufacturer’s specific recommendations to ensure optimal performance.
Is There a Universal Type of Coolant That Works for All Cars?
While there are “universal” or “global” coolants that are designed to be compatible with a wide range of vehicles, it’s always safest to use the specific type recommended in your owner’s manual to ensure it meets the needs and specifications of your particular vehicle.
What Should I Do if the Coolant Is Leaking?
If you notice a leak, it’s essential to identify the source and severity. Minor leaks might be a DIY fix with the right tools and knowledge, but significant leaks or issues should prompt a visit to a professional mechanic to avoid engine damage and ensure safety.
Can I Use Water as a Temporary Coolant in an Emergency?
While water can be used temporarily in emergency situations, it’s not a long-term solution. Water doesn’t have the same cooling properties or freezing and boiling point modifiers as specially formulated products. Ensure to replace it with the appropriate antifreeze as soon as possible to avoid engine damage or reduced performance.