Ever hit a curve and felt your four-wheeler lean a bit too much for your liking? That’s your suspension system talking, telling you it might be time for some DIY maintenance. If you’re wondering how to replace sway bar links, here’s everything you need to know to get that ride feeling smooth again.
The replacement process is pretty straightforward – it involves safely jacking up the vehicle, removing old links, and installing new ones. With the right tools on hand, the DIY approach can be both cost-effective and satisfying. However, make sure to always prioritize safety – work on a level surface, utilize jack stands, and if ever in doubt, consult a professional.
What Are Sway Bar Links?
We all crave a smooth, balanced drive, especially when taking sharp turns or going on an off-road driving adventure. That’s where the unsung heroes of vehicle stability step in – but what exactly are sway bar links?
These components, sometimes referred to as stabilizer bar ends or anti-roll links, are integral parts of your vehicle’s suspension system. They’re essentially the peacekeepers, ensuring your car remains steady and level, particularly when cornering. By doing so, they minimize that uncomfortable “body roll” feeling, enhancing your driving experience.
They Are Typically Made of Steel or Reinforced Aluminum
These components bridge a vital connection between either the control arm or the strut and the sway bar. To ensure harmonious communication between various parts of your four-wheeler, they need to have a robust construction, typically from steel or reinforced aluminum.
Their role is to make sure your tires stay snug against the road, maximizing grip and stability, no matter if you’re cruising down the famous routes in the US or through one of the cities with the worst drivers. However, they are far from invincible. In fact, they can often be the Achilles’ heel of the suspension system, becoming vulnerable over time.

Symptoms of Worn-Out Sway Bar Links
When something feels off in your ride, there are a few telltale signs that a component in your suspension system isn’t performing its best. Recognizing these signs early can save you from a compromised driving experience and potential safety issues, so consider it a driver’s responsibility.
As with any vehicle malfunction, you’re probably wondering – how much does it cost to replace sway bar links? Should I address it as soon as I notice the first telltale signs? While you should definitely deal with the problem as soon as possible, there’s no need to worry – this is not one of those expensive repairs that make you second-guess your car ownership.
Here are a few common symptoms that these vital stabilizers are due for replacement:
Unusual Noises While Driving
Ever heard a rattling, clunking, or even a metallic squeak when you’re driving over bumps or turning corners? That’s your four-wheeler communicating with you – such sounds can indicate that the stabilizer bar is crying out for attention.
Excessive Body Roll During Turns
If you start to feel like you’re navigating a boat on waves every time you make a turn, it’s a heads-up. Experiencing an exaggerated swaying or leaning sensation during cornering is a hallmark sign that there’s wear and tear you need to address.
Steering Vibrations
If there’s damage or wear and tear, these components can cause vibrations in the steering wheel while driving. These vibrations typically increase with the vehicle’s speed or when taking a turn.
Uneven Tire Wear
Your tires tell a story, and uneven wear patterns are a chapter you shouldn’t ignore. If one side of your tire is wearing down faster than the other, it might be a consequence of a compromised stabilizer bar affecting tire alignment and pressure distribution.
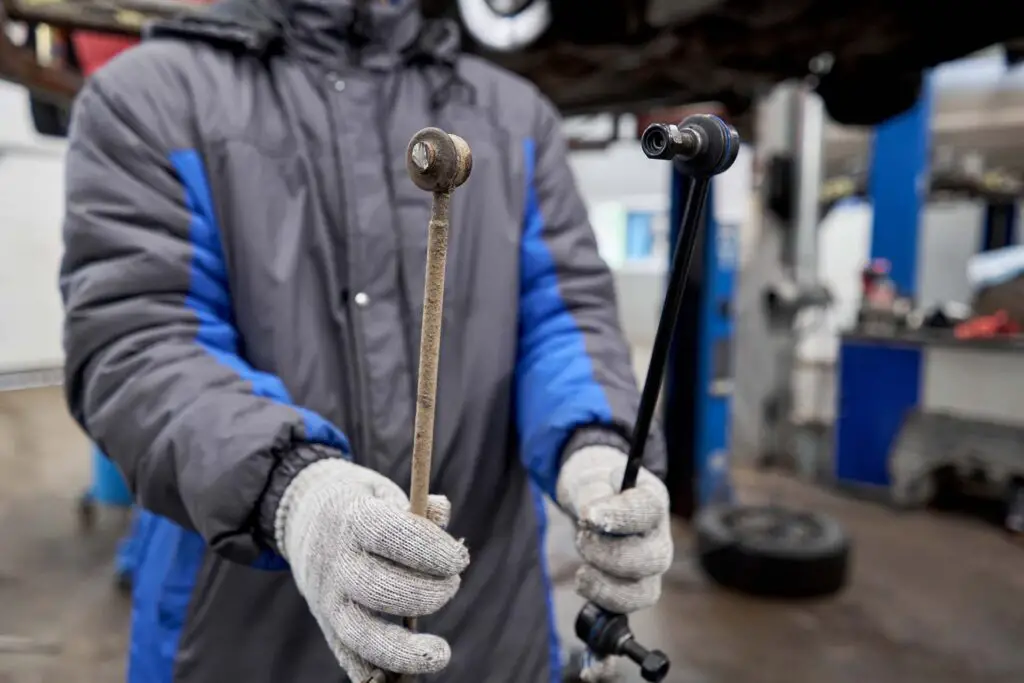
Visible Signs of Wear or Damage When Inspected
Lastly, a hands-on visual check can be revealing. When giving your four-wheeler a once-over, look for any obvious signs of wear, cracks, or breaks in the components. These visual cues are straightforward indicators that it’s time for a replacement.
Tools and Materials Needed
Notice any of those warning signs we’ve just discussed? Here’s the silver lining – you don’t need to rush to a mechanic right away. For those with a bit of DIY spirit, you can roll up your sleeves and tackle this job yourself.
You might be wondering – how long does it take to replace front sway bar links? Am I going to spend the whole day in the garage? Actually, this is a surprisingly swift task – typically, you’d be looking at a window of half an hour to an hour, depending on your skills and experience. However, you first need to get the necessary tools and materials:
| Floor jack and jack stands | Lifting and securely holding the vehicle |
| Wrench set | Adjusting and removing nuts and bolts |
| Lug nut wrench | Removing wheel lug nuts |
| Ratchet and socket set | Efficiently working with various bolt sizes |
| Penetrating fluid | Loosening rusted or stuck bolts |
| Vice grips or pliers | Holding parts securely by pulling or twisting |
| Torque wrench | Ensuring bolts are tightened to correct specs |
| A new replacement | Replacement for the worn-out link |
After gathering your tools, a critical point is to ensure that the new component you pick up matches your vehicle’s specific make and model. Going for generic parts might be tempting in terms of pricing, but the wrong part can compromise the entire system’s efficiency and safety. Plus, the right fit ensures a smoother installation process without any hitches.
How to Replace Sway Bar Links – A Step-By-Step Guide
Every now and then, especially if you’re a fan of those rougher roads, there comes a time for a little vehicle maintenance. In such scenarios, you’re probably asking yourself – how much does it cost to replace front sway bar links? Well, parts usually hover under the $100 mark for most vehicles, with many costing a mere $30 or so.
But hold onto your wallet because labor often costs more than twice that amount. So, it makes perfect sense to take matters into your own hands, doesn’t it? Here’s the ultimate guide to ensure you take all the necessary steps.
Step 1- Safety First
Before diving in, ensure you’re geared up with safety equipment, such as gloves and eye protection. Moreover, your four-wheeler needs its safety gear too. Position it on a flat, even surface and engage the parking brake – it’s all about laying the groundwork for a smooth, safe procedure.
Step 2 – Lift the Vehicle
Lifting a vehicle isn’t about strength – it’s about technique. Here’s how to do it:
- Consult the owner’s manual about the secure lift points of your vehicle,
- Place the floor jack under one of those points,
- Pump the jack to raise the car gently off the ground,
- Slide the jack stands underneath, positioning them at the designated standpoints,
- Lower the car onto the jack stands slowly, ensuring they’re holding the weight securely.
Step 3 – Locate the Sway Bar Links
Now, with your car elevated, it’s time to identify the culprits. To do this, begin at the wheels. From there, trace back towards the chassis or the car body. As you inspect, you’ll come across a long, thin metal bar, which often spans the width of your vehicle. This is the sway bar, and the pieces connecting it to the suspension are the components we’re looking to address.
Step 4 – Remove the Old Sway Bar Links
Here’s how to remove the old components to make space for the new ones:
- Apply penetrating fluid generously to the nuts and bolts of the links,
- Wait for a few minutes for the fluid to work effectively,
- Using your ratchet and socket set or wrench, start by loosening and removing the top nut,
- As you get the nuts and bolts loose, hold onto the link with vice grips or pliers to prevent it from turning,
- Detach the bottom nut of the link using the same process,
- With both nuts removed, you can now take out the link from its position.
Step 5 – Install the New Sway Bar Links
Installing the new components is equally as straightforward:
- Insert the new link into its place, ensuring it aligns well with the mounting holes,
- Hand-tighten the top and bottom nuts,
- Using your ratchet and socket set or wrench, tighten the nuts securely,
- Use a torque wrench to tighten the nuts to the manufacturer’s specified torque setting.
Step 6 – Lower the Vehicle
With the new components firmly in place, it’s time to bring your four-wheeler back to the ground. Once again, it’s a reversed process – start by repositioning the floor jack under the car at the initial lift point. Begin raising the vehicle slightly to take the weight off the jack stands and remove the stands from beneath. Last but not least, slowly lower the car using the jack until it’s fully on the ground.
Step 7 – Test Drive
Before you call the task complete, it’s essential to give your handiwork a road test. Take a short drive around your neighborhood or on familiar roads. Pay attention to any noises, the handling of turns, and the overall feel of the vehicle. Remember, your vehicle should feel more stable, and the earlier symptoms should no longer be present.

Tips and Warnings
Venturing into the world of DIY vehicle maintenance brings a unique sense of accomplishment, but there are a few critical guidelines to always keep front and center. For starters, never, under any circumstances, work beneath a vehicle solely propped up by a jack. Jack stands are your safety nets, so make sure to use them diligently.
On the topic of the parts themselves, it’s tempting to hunt for bargains but always prioritize quality over cost. Opting for premium replacement parts not only ensures the longevity of your repair but also the safety of your vehicle. And finally, even with the best DIY spirit, there’s no shame in seeking a second opinion. If you’re ever in doubt about your work, it’s always a wise move to have a professional give your four-wheeler a once-over.

Wrapping Up Under the Hood
There you have it – replacing these vital suspension components isn’t as hard as it might’ve seemed at first, right? Just remember to keep safety at the forefront, trust in quality parts, and never shy away from a professional’s advice when in doubt. Your four-wheeler, with its now rejuvenated suspension, will surely thank you with smoother rides.
FAQ
How Often Should Sway Bar Links Be Replaced?
Sway bar links typically last between 50,000 to 100,000 miles, but it’s a good idea to inspect them during regular vehicle maintenance or if you notice handling issues.
Can I Drive With a Broken Sway Bar Link?
While it’s possible to drive with a broken sway bar link, it can affect handling and safety, especially during turns. It’s advisable to get it fixed promptly.
How Much Does It Typically Cost to Replace Sway Bar Links at a Mechanic vs. DIY?
At a mechanic, the cost can range from $100 to $300, including parts and labor. Going the DIY route, parts typically fall between $20 to $100, saving you on labor charges.


