Have you ever popped the hood of your prized ride and wondered – where do I even begin? There are many things to look into, but it doesn’t have to be so hectic. Let’s get back to the basics, learning how to check the engine oil level in the car. This non-negotiable task is easier than you think, and it can save you a lot of headaches down the road.
Once your four-wheeler is parked on a level surface and the engine is turned off, you should pull out the dipstick, wipe it clean, and reinsert it fully. After letting it stay in for a moment, pull it out again and inspect the markings to determine if you need to add some engine oil. If low, use a funnel to add the necessary amount. Then, recheck the levels to ensure everything’s in order before securing the dipstick and closing the hood.
Why Checking Engine Oil Is Important?
Engine oil is the lifeblood of every modern vehicle. It’s responsible for lubricating the engine’s moving parts, reducing friction, and ensuring everything runs smoothly. It also helps to keep this vital component cool, preventing it from overheating and warding off rust and corrosion.
Neglecting this task in your maintenance routine can lead to a host of issues, turning that neglect into potential costly repairs or, worse, a breakdown at the side of the road. Here are some of the consequences of not keeping an eye on that essential liquid gold:
- Accelerated wear and tear of the engine and potentially significant damage over time,
- The motor becomes more prone to overheating, affecting its performance and lifespan,
- Inadequate levels can also cause poor fuel efficiency and increased emissions.
Tools and Materials Needed to Check the Oil Level in Car Engine
Before you get started on this task, you’ll want to gather all the necessary tools and materials. It’s pretty simple – having everything at hand will make the process smoother and more efficient.
Here are the tools and materials you’ll need:
| Materials | Purpose |
| Dipstick | A built-in feature in most vehicles used to measure oil levels |
| Lint-free rag or cloth | Helps to wipe the dipstick clean for an accurate reading |
| Engine oil | Necessary if you need to top up the levels after checking |
| Funnel | Assists in adding the liquid to the engine without spills |
Safety Is Always a Top Priority When It Comes to Vehicle Maintenance
It’s not just about pulling out the dipstick and taking a peek. You want to ensure accuracy and safety while doing so. Also, weare gloves that can protect your hands from residue and potential irritants. It’s also wise to have a pair of safety glasses to protect your eyes from splashes or debris.

Here Are a Few High-Quality Engine Oils You Should Have On Your Radar
When it comes to maintaining your four-wheeler’s performance and longevity, selecting the right lubricant is crucial. But not all engines are made the same. Some prefer synthetic oils, while others, for example, diesel vehicles, require specially formulated products. Because of that, always turn to your owner’s manual as your primary source.
You should do your research and check if the products align with the manufacturer’s specifications and recommendations. Here are a few of my personal favorites in today’s market:
- Pennzoil Ultra Platinum Full Synthetic Oil – it’s a carbon-neutral formula, making it an eco-friendly choice,
- Mobil 1 Extended Performance Full Synthetic Motor Oil – offers great performance even during the coldest months of the year,
- Valvoline High Mileage with MaxLife Technology Synthetic Blend – specifically formulated for vehicles that have a high mileage.

Step-By-Step Guide on How to Check the Engine Oil Level in the Car
With the tools and high-performing options out of the way, it’s time to dive into the nitty-gritty of how to check the oil level in a car engine. It’s a straightforward process that, when done regularly, can keep your vehicle running smoothly and efficiently. Let’s walk through every step of the process, ensuring you feel confident to tackle this task with ease.
Step 1 – Park Your Car on a Level Surface
First and foremost, make sure that your four-wheeler is parked on a level surface. This is crucial for obtaining an accurate reading of the fluid level. If the ground is uneven, the lubricant may pool to one side, leading to a misleading reading.
For your safety, always engage the parking brake to prevent any unintended movement of the vehicle. It’s also essential to avoid hot surfaces when you are performing this task. You want to steer clear of any potential burns or injuries. Once you’ve found the perfect spot, turn off your vehicle. Allowing it to rest ensures that the fluid settles, offering a precise measurement when you proceed to check the levels.
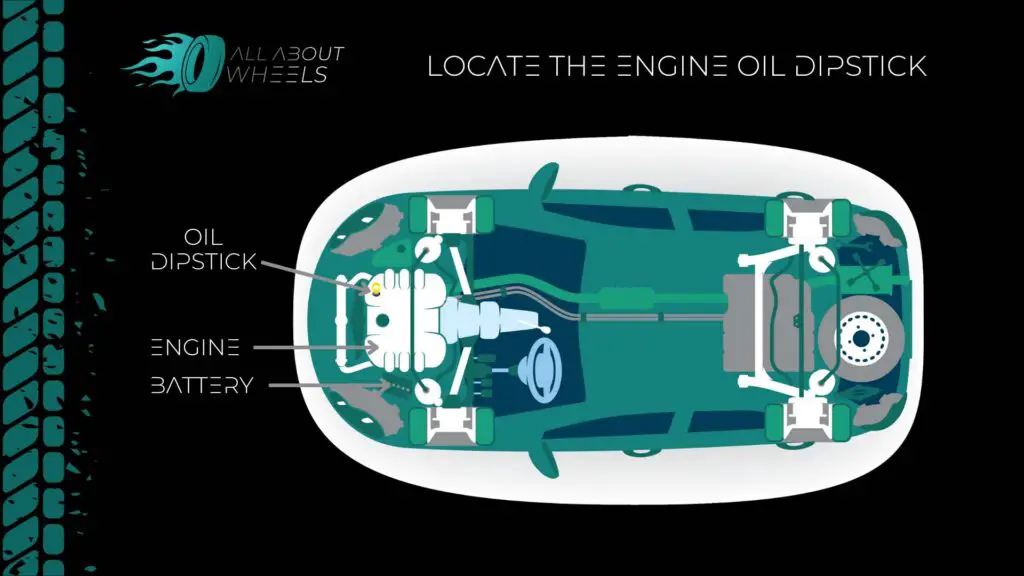
Step 2 – Locate the Engine Oil Dipstick
In most models, you’ll typically find the dipstick on the left side of the engine compartment. It’s designed to be easily noticeable, so watch for a distinctive yellow or orange circular handle.
Pulling this handle reveals a lengthy metal piece that slides out, giving access to check the lubrication levels. If pinpointing the dipstick’s location proves tricky, don’t hesitate to refer to your owner’s manual for detailed guidance specific to your vehicle.
Step 3 – Remove and Wipe the Dipstick Then Reinsert It
Once you’ve located the dipstick, it’s time to get a clearer picture of your vehicle’s levels. Here are the first couple of steps you need to take:
- Gently pull the handle – it should slide out smoothly, revealing the metal rod that’s been submerged in the lubricant,
- Inspect the dipstick – you’ll notice markings on the lower end, which indicate the optimal and low levels,
- Clean with a lint-free rag – it’s essential to use a cloth that won’t leave residue on the dipstick to ensure an accurate reading,
- Reinsert the dipstick fully – once you’ve removed all the lubricant from the dipstick, slide it back into the reservoir,
- Pause for accuracy – wait for a moment to allow the dipstick to settle and ensure that it comes into contact with the lubricant adequately.
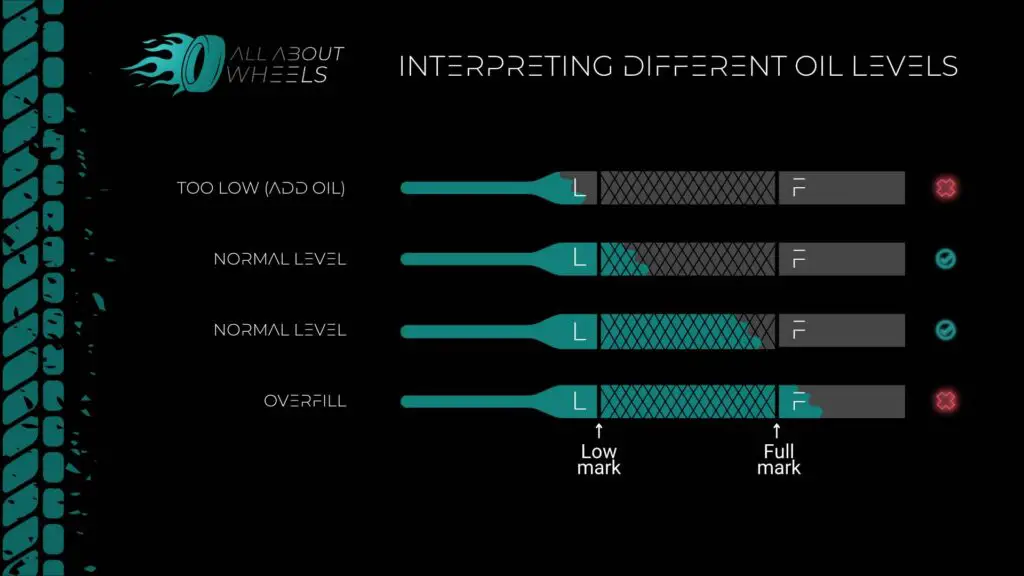
Step 4 – Remove and Check the Dipstick Again
After giving the dipstick a moment to settle, it’s time to remove it once again for the moment of truth. By carefully pulling it out and inspecting the marking, you’ll get a clear understanding of the current state of your vehicle’s lubrication.
Reading the levels is fairly straightforward, as the dipstick serves as your guide. Each marking provides valuable insights. Informing whether it’s time for a top-up or if everything is in tip-top shape. Here are the possible options and what each of them means:
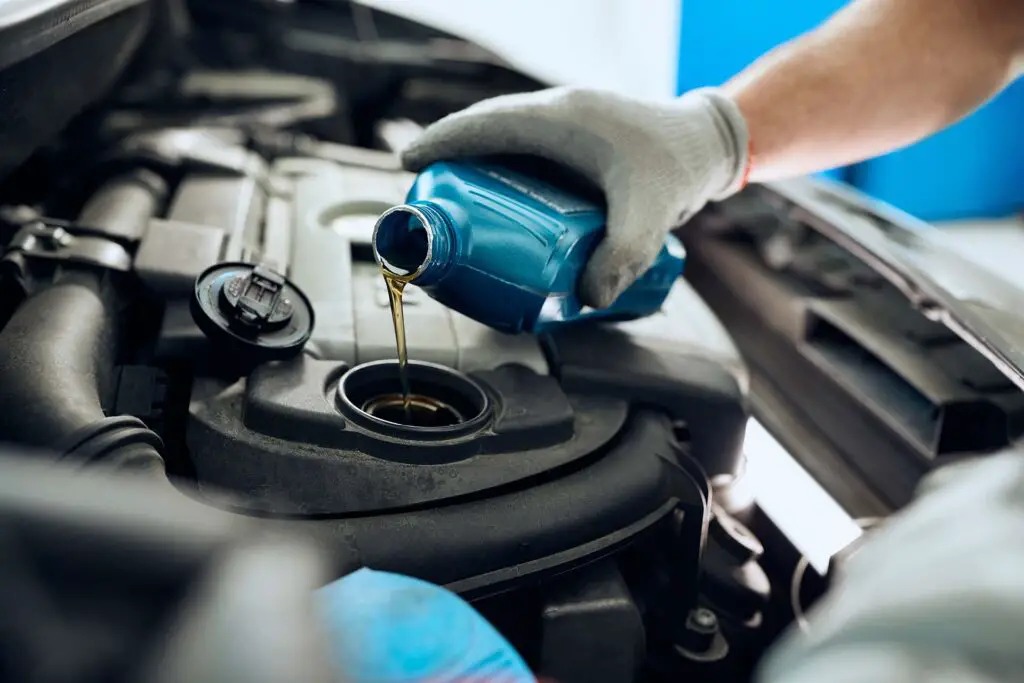
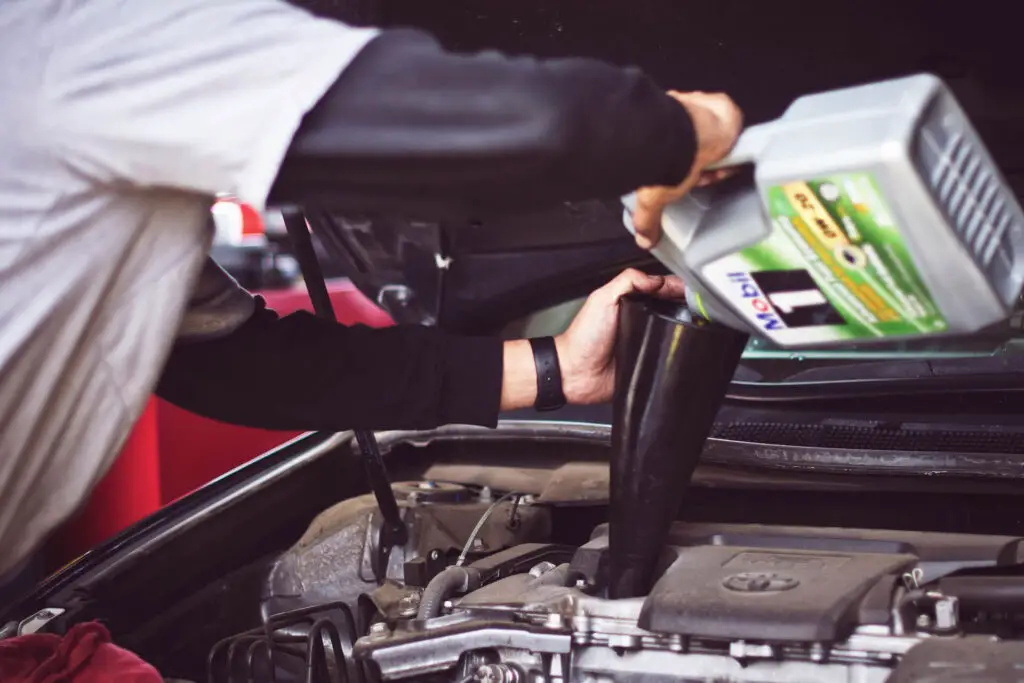
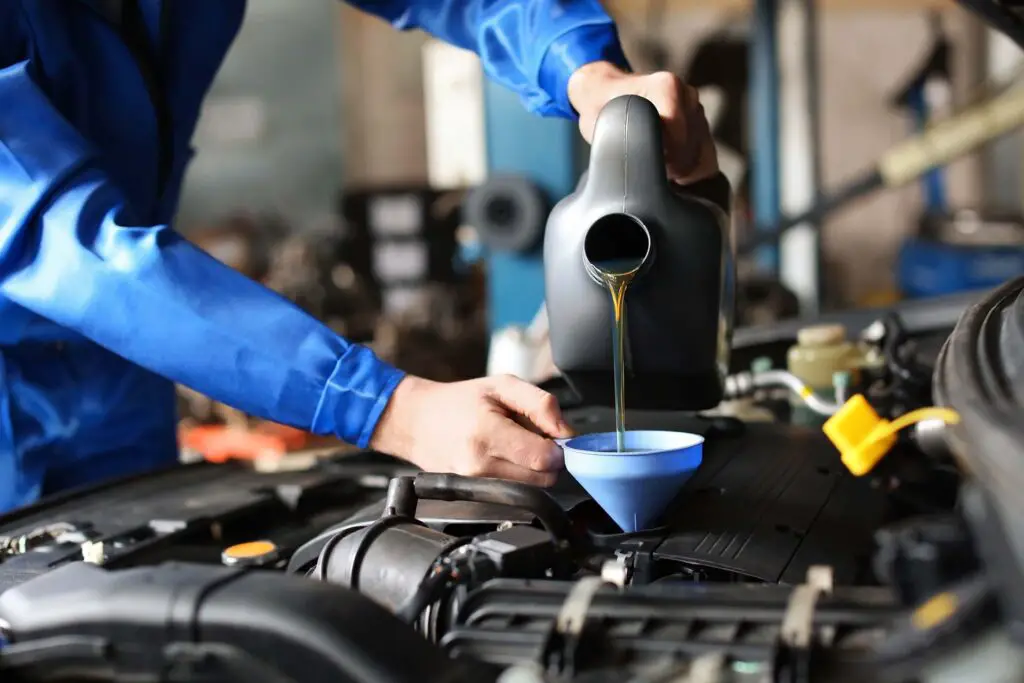
Step 5 – Adding Some Oil if Necessary
If the levels are found to be on the lower side upon inspection, you need to top up your car’s lubricant to ensure optimal performance. Here’s how to do it:
- Unscrew the cap – it’s typically labeled and easy to identify,
- Insert a funnel – place a funnel into the opening to avoid spills and ensure a clean pour,
- Add the lubricant – pour the product slowly, being cautious not to overfill,
- Screw the cap back on – ensure the cap is tightly secured to prevent leaks and contamination,
- Wipe any spills – use a clean rag to wipe off any spills around the area.
Step 6 – Recheck the Levels
After adding the necessary amount, it’s crucial to recheck the levels to ensure adequacy and avoid overfilling. Pull out the dipstick, wipe it clean, and reinsert it for an accurate reading. The lubricant should now register within the optimal markings. Ensuring your vehicle operates efficiently and safely.
Step 7 – Secure the Dipstick and Close the Hood
With the levels rechecked and confirmed to be within the optimal range, ensure the dipstick is fully inserted back into its housing to prevent contamination or damage. With everything in check, lower the hood and secure it, ensuring it’s tightly closed. Congratulations, you’ve successfully navigated through the process of checking and topping up your car’s lubricant levels!
Should You Do It Alone or Take Your Car to a Mechanic?
While checking and topping up the oil levels in your four-wheeler is a manageable task for many, there are instances where seeking professional help is advisable. Mechanics are trained to handle a variety of maintenance and repair tasks. And sometimes, their expertise is indispensable.
But how do you decide when it’s a DIY moment and when it’s time to hit the garage? Here are scenarios where heading to a mechanic is the wiser move:
- If you find the levels are consistently low, indicating a possible leak or consumption issue,
- If your vehicle is showing signs of performance issues like strange noises, overheating, or decreased fuel efficiency,
- If warning lights related to lubrication or overall vehicle performance are illuminated on your dashboard.
Here’s to Empowering Your Journey With Knowledge and Confidence
As we wrap up this comprehensive guide, it’s clear that understanding how to check and manage the levels in your precious ride is a vital skill every driver should possess. It not only empowers you with knowledge about your vehicle’s health but also fosters confidence in its performance and reliability. Have a safe trip, and may every journey be a smooth one!
FAQ
How Often Should I Check My Car’s Engine Oil Level?
It’s advisable to check the levels every month and before long journeys. Regular checks help identify any potential issues.
Is There a Best Time of Day to Check the Engine Oil Level?
The ideal time to check the levels is when it’s warm but not hot, typically after letting the vehicle sit for a few minutes post-driving. This allows the lubricant to settle and gives a more accurate reading.
What if the Oil on the Dipstick Has a Milky Appearance?
If the oil appears milky, it may indicate coolant contamination due to a head gasket leak. It’s essential to address this immediately by consulting a professional mechanic to diagnose and rectify the issue. Preventing potential severe damage.


