There’s nothing quite like the peace of mind that comes with being prepared for the unexpected. Knowing how to use a tire sealant kit can ensure you’ll never again be caught off guard by a flat while on the road. With a simple application process and fast results, this little lifesaver is a must-have for every vehicle owner.
A tire sealant kit is a quick, temporary solution for flat tires. These kits typically include an inflation device, sealant, and application tools. Attach it to the tire valve, inject the sealant, and use the compressor to reinflate. However, keep in mind that it’s a temporary fix, so seek professional repair promptly.
What Goes Into Tire Sealant Kits?
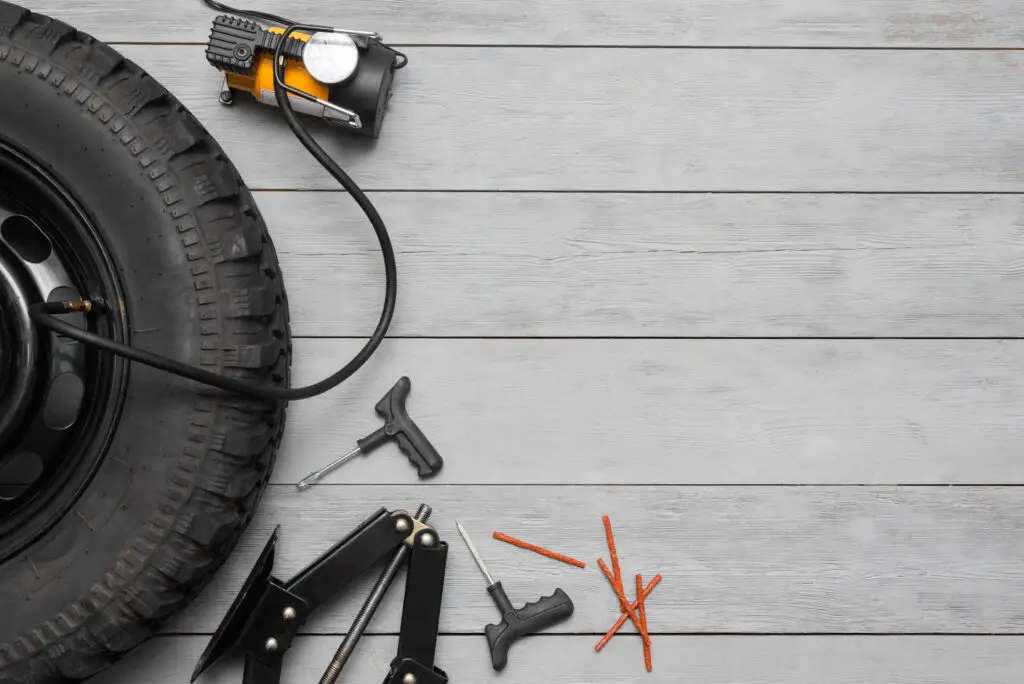
These repair kits are your first line of defense when facing a flat tire. Compact yet mighty, they are equipped with the essentials to swiftly address punctures and get you rolling down the famous US routes again. Here’s what’s usually contained within these magical packages:
| Component | Purpose |
| Inflation Device | To inflate the wheel, restoring its shape and functionality |
| Sealant Solution | Fills punctures, creating a temporary barrier against air loss |
| Hose/Tube | Facilitates the application of the solution into the wheel |
| Gloves | Ensures hands stay clean and protected during application |
Why Should You Use a Tire Sealant Kit?
When facing an unexpected deflation, having a quick fix within arm’s reach can be a game-changer. Here’s what makes these packages so indispensable:
- Swift and efficient response to unexpected deflations,
- Enhances safety by minimizing the time spent on the roadside,
- Cost-effective alternative to immediate professional repair,
- Extends the lifespan of the affected wheel, albeit temporarily,
- User-friendly, requiring no specialized skills or tools.
What Types of Sealant Kits Are Available?
While the core objective remains constant, variations in design and application offer drivers a tailored experience. Here are the popular options gracing the market:
- Aerosol cans – products such as the Slime Fix-a-Flat are a one-step solution, combining inflator and filler, offering a quick albeit temporary fix,
- Compressor and filler combo – packages such as the Slime Flat Tire Puncture Emergency Kit offer more control over the inflation process and the application of filler, ensuring a more precise fit,
- High-tech options – advanced kits like the AirMan ResQ Tire Repair Kit feature high-quality solutions, sealant injectors, and electronic air compressors for an efficient and user-friendly experience.
How Often Should You Use a Tire Sealant Kit?
These kits are primarily designed for emergency use – they offer a temporary solution designed to get your four-wheeler to a service station for proper repair. Therefore, it’s not advisable to view this as a permanent fix or a regular maintenance tool, but rather as an emergency solution to be used sparingly, only when you really need it.

Preparing for the Repair Process
Safety, the number one driver’s responsibility, is paramount when faced with a deflated wheel. So, if you find yourself in this situation, first find a stable, flat surface away from traffic to park your vehicle. Also, turn on your hazard lights immediately to alert other drivers of your presence.
Handle the Kit With Caution to Ensure a Successful Repair
Though the contents of these emergency repair packages are designed for ease of use, approaching the task with caution is essential. Find the set in the trunk (or frunk), and then read the instruction manual thoroughly before proceeding. Every component, from the inflation device to the filler solution, should be handled with care to prevent any inadvertent damage or incorrect application.

How to Use Tire Sealant Kit – A Step-By-Step Guide
Facing a deflated wheel can be a frustrating ordeal, but with the right tools and knowledge at your disposal, it becomes a manageable hurdle. Here’s the ultimate walkthrough that will turn this unexpected setback into a minor pit stop, swiftly getting you back on the road:
Step 1: Get Your Kit and Read the Instructions Carefully
In the face of deflation, the first instinct is to act swiftly, but it’s important to completely familiarize yourself with the product you’re using. As already mentioned, if you haven’t had the chance yet, now is the perfect time to take a breather and read the included instructions. After all, every package is unique, with specific steps that ensure optimal performance.
Step 2: Attach the Kit to the Tire Valve
With knowledge secured, proceed to attach the package to the wheel’s valve. Ensure it’s tightly secured to prevent any leaks. The connection should be firm but not forced. This balanced pressure will ensure that the filler and air flow into the tire seamlessly, making the repair process efficient.
Step 3: Inject the Sealant Into the Tire
Once the kit is securely attached, it’s time to initiate the process of injecting the filler into the wheel. This sealant acts swiftly, journeying through the interior, locating, and sealing the puncture. Allow the filler to fully dispense, ensuring the internal breach is adequately addressed.
Step 4: Inflate the Tire Using the Compressor
With the puncture sealed, attention turns to restoring the wheel’s shape and pressure. This is done by using the compressor to inflate it to the appropriate pressure level. Monitor the process, ensuring it neither under-inflates nor over-inflates, striking the perfect balance for optimal performance.
Step 5: Remove the Kit and Check the Tire Pressure
After inflation, detach the package from the wheel’s valve and conduct a pressure check. This ensures that the inflation is within the recommended levels, affirming the readiness for travel. A final inspection confirms the repair’s success, and with the emergency averted, the journey can safely resume.
What to Do After Using the Kit
With the tire patched up and ready to roll, stepping back behind the wheel is met with a sigh of relief. However, it’s essential to proceed with caution. As already discussed, a repair package is a temporary fix, designed to get you off the roadside, but it’s not a permanent solution. Once you get back on the road, make sure you:
- Drive slowly and avoid high speeds to minimize pressure on the recently repaired wheel,
- Pay attention to the wheel’s performance, as any abnormalities should prompt immediate attention,
- Plan to visit a professional service station promptly for a thorough inspection and repair,
- Stick to smooth surfaces to reduce stress on the affected wheel.
Temporary Fix vs. Getting a Professional Repair
The filler seals the puncture and allows for limited travel, but a professional repair is paramount to ensure the wheel’s integrity and safety. Therefore, make sure you visit a service station at your earliest convenience, where experts can assess, repair, or replace the wheel as needed. The issue will not only be completely solved, but you’ll also have the peace of mind of knowing that every journey ahead is safe and secure.
Some Helpful Tips for Regular Tire Maintenance
Tires typically boast a lifespan of several years, depending on various factors such as your driving habits and the roads you usually cruise on. For example, someone who regularly drives in stop-and-go traffic in one of the cities with the worst drivers will definitely replace tires more often than someone who enjoys more pleasurable rides.
Moreover, the longevity of your tires is contingent upon regular maintenance. Proper care not only ensures optimal performance but can also extend the life of your wheels, ensuring safe and smooth travel. Here are the most important maintenance tips:
- Regular pressure checks – regularly monitor the pressure to ensure it aligns with the manufacturer’s recommendations,
- Regular rotation – rotate your winter and summer tires to ensure even wear, enhancing their lifespan,
- Balancing – ensure that the tires are balanced to avoid vibrations and uneven wear,
- Alignment – regular alignment checks prevent irregular wear and ensure optimal handling both on and off the road,
- Regular inspection – check for cuts, cracks, or bulges, and seek professional help if any abnormalities are detected.

Sealing the Deal and Embarking On Your Journey Safely
Equipped with the right repair package and knowledge, turning a potential travel halt into a brief pit stop becomes second nature. Though a temporary fix, these kits offer immediate relief, paving the way to a professional repair. It’s a symphony of preparation and precision, where each note resounds with the assurance of safety and the melody of uninterrupted travels.
Frequently Asked Questions About Tire Sealant Kit
How Long Can I Drive After Applying the Emergency Repair Solution?
It’s meant as a temporary solution to get you to a service station, not for extended use. Typically, it’s safe to drive for up to 50 miles at a reduced speed but always refer to the specific guidelines provided in your kit’s instructions.
Can These Repair Packages Be Used on All Types of Wheels?
These kits are generally designed for standard passenger vehicle wheels. They might not be suitable for larger wheels on trucks or RVs, or specific types of performance or motorcycle wheels, always check the kit’s specifications and limitations.
Does the Filler Solution Expire?
Yes, the solution has a shelf life. It’s essential to check the expiration date to ensure its effectiveness. Replace expired products to ensure you have a reliable emergency solution on hand.
Will Using a Repair Package Void My Wheel Warranty?
It depends on the warranty’s terms and conditions. Always check your wheel and vehicle warranty to understand any restrictions or conditions related to the use of emergency repair solutions.
Can the Repair Solution Damage My Wheel?
If used correctly, according to the instructions, it shouldn’t cause damage and can be easily cleaned out during a professional repair. However, leaving the solution in the wheel for extended periods beyond the recommended temporary usage can potentially lead to issues, so getting a professional repair promptly is essential.
Is the Repair Solution Environmentally Friendly?
The environmental impact varies between different brands and types of sealants. It’s advisable to check the label for specific information on biodegradability and environmental impact. Some products are designed to be more eco-friendly than others.
Can I Use the Kit in Any Weather Condition?
While these kits can be used in various conditions, extreme cold or heat might affect the performance of the sealant or the inflation device. Always check the product’s specifications and guidelines to ensure effective usage in specific weather conditions. Make sure also to prioritize your safety, especially in adverse conditions.


