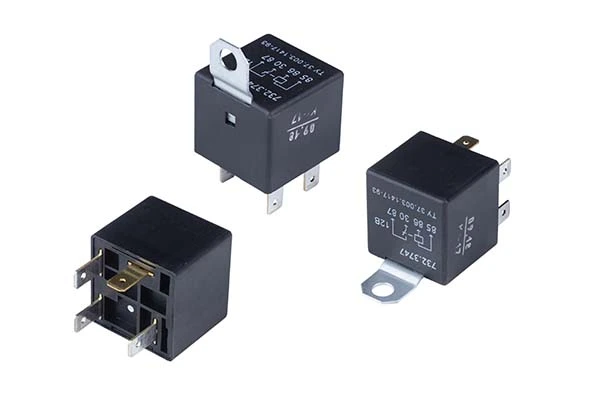
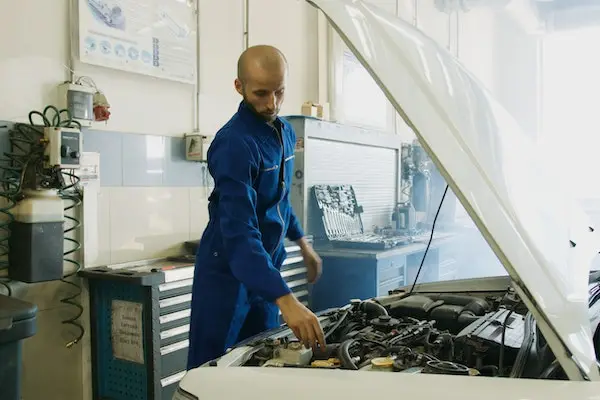
Relays are small car parts that control many different electrical car components. When some of these components fail, the faulty relay can be the cause of it. But how to tell if a relay is bad? Testing them is a simple and not-at-all time-consuming process, but you must know how to do it properly – and this guide will help you learn.
The easiest way to test if a relay is bad is to check if the circuit flows undisturbed through the relay slots and between the relay and a car component. You can do it easily, with the help of a digital multimeter. If everything seems alright then you’re probably dealing with a faulty relay. Luckily, this car part can easily be changed – all you have to do is buy a suitable replacement.
What Is a Car Relay?
Relays are an integral part of nearly all vehicles, from cars and vans to trucks and trailers, and they are even used in the aviation and marine industries. Automotive relays are electronically (usually electro-mechanically) operated switches that control a circuit with a greater amperage. High amperage can be the cause of melting wires or sometimes even fires, but relays are there to prevent it.
They enable many different electric car components to function, such as the tail light, for example, windshield wipers, or even the car alarm. Keep in mind that relays can control more than one system at the same time.
Where Are Car Relays Located?
One average vehicle can have up to twenty relays located in different places in the car. However, they can usually be found underneath the steering wheel and dash or in the engine compartment. If you’re uncertain where your car relays are located, take a look at fuse block covers or service manual – they usually contain an electrical schematic with the position of automotive relays and fuses.
Different Types of Automotive Relays
Although today you can find many different relay types on the market, the most common ones are so-called changeover relays and make-and-break relays. Take a look a the table below to see the difference:
| Type of relay | Make-and-break | Changeover |
| Number of pin terminals | Four | Five |
| High current circuit | One | Two |
| The way it works | It makes or breaks a single high-voltage circuit | It changes which of the two circuits is open or closed, depending on the desired action |
| Example | Car ignition switch | The dipped or the full beam of vehicle headlights; Heating/cooling air-conditioning system |
How Does a Relay Work?
A relay is usually made of a soft iron core (solenoid) wrapped with a coil of wire. It possesses an iron armature that is movable, a set of contacts, and a low-resistance iron yoke. Depending on the function of the relay, and, therefore, its design, there can be many sets of contacts. The yoke is connected to the contacts via a hinged armature that is attached to it.
Once you turn on the vehicle and activate the correspondent switch (such as the car ignition switch), the low-amperage current is sent through the relay and, as a result, the electromagnet inside of the relay is activated. This leads to closing the independent second circuit, which allows high amperage to be sent directly to the suitable car component.
Where Does Each Electric Circuit Flow?
All relays need to have standardized numbers identifying the connection pins – and they can usually be found on the relay body. On relays with four connection pins, you’ll be able to see numbers 85, 86, 87, and 30. Once you turn on the corresponding switch, the power from it gets to the relay through pin 85 and out of it through pin 86. These pins are on the relay’s control side, and they make a complete circuit which results in the activation of the electromagnet.
The electromagnet then closes the independent circuit that flows between pins 30 and 87. High-amperage current enters the relay from the battery through pin 87, flows out through pin 30, and goes directly to the corresponding vehicle component.

What Can Cause a Relay to Fail?
There are a few factors that can cause relays to stop working – here are the most common ones:
- Carbon accumulation – it occurs when the relay’s mechanism doesn’t make full contact or is stressed out due to higher amperage. With too much carbon accumulated, pins are prevented from reaching the connectors.
- Wear and tear – as with many other car parts, the relay is exposed to wear and tear over time. It’s good to have this in mind, especially if you’re buying a used car.
- Excessive voltage – once you turn on the vehicle, the current will automatically flow through the relays, and excessive voltage can damage some of them,
- Mechanical and environmental issues – relays can suffer mechanical damages due to, for example, vibration, especially if you’re an off-road driving enthusiast. On the other hand, keep in mind that corrosion and heat can also cause relays to fail.
How to Tell if a Relay Is Bad?
A relay manages numerous electrical parts of a machine or car. Therefore, there is a chance the relay could be broken if a component isn’t functioning because electricity isn’t flowing to it. However, a little elementary research is necessary to determine if a relay is malfunctioning.
If you suspect that you have a faulty relay, your next step is to test this theory. However, you first need to locate the relay you want to check. Its location will depend on what the relay is controlling. If you’re unsure where to find it, know that you can find the answer by simply looking at your manual.
Once you’ve found it, you can go the easy way and simply replace it without testing it – especially if there is visible damage on the relay’s body, such as blackening or melting. However, if you see no damage after the visual inspection, it’s not such a good solution. The problem with this action lies in the fact that your second relay could fail for the same reason. Therefore, I strongly advise you to test if the problem is, in fact, in relay – and see where to look for the problem solution. Here is what you should do:
Once you’re done with this extensive inspection, and you don’t see any issue with the circuit flow, it’s most likely that the relay is bad.

What to Do if You Have a Faulty Relay?
Dealing with a faulty relay is pretty easy – all you have to do is replace it. You would need more time to remove paint from the car or even change a flat tire. The only thing you need to make sure of is that the replacement relay is identical to the faulty one you’re removing. Remember – the wrong relay can end up damaging your car’s electrical system.
Once you have the right relay type in your hands, take a look at the prong layout and ensure you’re placing the new relay at the exact same orientation. Line it up, push it down into place – and that’s it.
Safety Precautions When Changing a Relay
Just because it’s freely simple to test and remove the relay, it doesn’t mean there are no safety precautions to be followed. First of all, you need to handle the new relay carefully – don’t let it drop or get damaged in any other way. A damaged relay can cause melting or even burn of your wiring. It should go without saying that you must not try to modify or change the relay in any way.
Next, ensure you’re working in a safe environment – when you’re dealing with electricity, don’t do it in a space that contains gasoline or other explosive and flammable fuels and gas. In the end, consult your service manual before you start, so you find out all you need to know about your car’s relay and wiring system.

How Much Does It Cost to Change a Relay?
How much it will cost to replace the faulty relay depends on several different factors, such as whether you’ll do it on your own or will you let a professional mechanic do it, the model of your vehicle, and the relay you need. Therefore, you can expect to pay anywhere between $2 and $250 dollars.
However, no matter the cost, make sure you don’t neglect this problem, since it can lead to much bigger issues in the car’s engine compartment. The faulty relay can burn the wires, and even cause a fire. Ignoring a faulty relay can lead to much costlier repairs down the road, and, more importantly, endanger your safety – so make sure you test it on time.

If You’re Not Certain Whether the Problem Is in the Relay, Ask a Professional for Help
Testing if your relay is faulty is easy – but only if you know what you’re doing. However, if you are not experienced in working with the car’s electric components, then the better solution may be to contact your mechanic. They will be able to detect the problem fast and answer if the issue truly is in a relay, or if you have a problem with some other car part. However, if you’re quite certain in your abilities, this guide should be more than enough to help you test the relay and determine the origin of the malfunctioning component.


