Whether you’re an avid car enthusiast or simply a conscientious driver, understanding the basics of vehicle maintenance can save you time, money, and headaches. One crucial aspect of vehicle repair is knowing how to replace a fender, as it plays a pivotal role in protecting your vehicle’s body and maintaining its aesthetic appeal. In this guide, I’ll take you through the step-by-step process of replacing it and how to tackle this task on your own.
To replace vehicle fenders, follow these steps: gather tools, assess the damage, and find a replacement. Then, remove old fenders carefully, prepare a new part, align and secure it, double-check alignment and fitment, and finalize the installation. By following this guide, you can confidently replace this component and restore your vehicle’s appearance.
What Is a Car Fender?
Imagine cruising down the open road, the wind tousling your hair and the purr of the engine beneath you. As you take in the sights, one vital component of your vehicle quietly stands guard, ready to shield you from the perils of the road. That unsung hero is none other than the vehicle fender.
Often overlooked, this vehicle component is not just a mere decorative panel but a robust barrier that wraps around your vehicle’s wheel wells, safeguarding it against debris, road spray, and unexpected encounters. Acting as a shield, the fender absorbs the impact of rocks, gravel, and other projectiles, keeping your car’s bodywork unscathed. But its role doesn’t stop there. It also plays a crucial role in enhancing your vehicle’s aerodynamics and contributing to its overall design.

How to Replace a Fender – It Is Important to Be Prepared
When it comes to replacing fenders on your vehicle, being prepared is the key to a successful and efficient repair. Whether you’ve encountered a collision or simply wish to refresh your four-wheeler’s appearance, knowing the ins and outs of fender replacement is invaluable. It ensures that you can swiftly address the damage and get back on the road, avoiding the inconveniences of living without a four-wheeler.
By equipping yourself with the necessary tools, understanding the step-by-step process, and taking necessary safety precautions, you empower yourself to tackle fender replacement confidently. And it can be the right thing to do since many people are asking themselves when will car prices drop.
So, embrace the knowledge and embark on this transformative journey, knowing that you hold the power to restore your vehicle’s beauty and reclaim the freedom that comes with a fully functioning car.
How Long Does It Take to Replace a Fender?
While the exact duration can vary depending on factors such as your familiarity with automotive repairs and the specific make and model of your vehicle, on average, a replacement can take several hours to complete. However, with careful planning and a methodical approach, you’ll soon find yourself triumphantly unveiling a newly installed fender, ready to hit the road with renewed confidence and pride.
Gather the Necessary Tools and Materials for the Fender Replacement
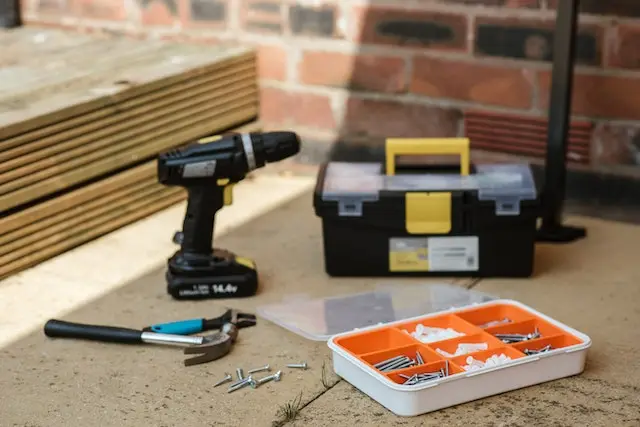
Before you dive into the intricacies of the removal and installation of this component, it’s crucial to equip yourself with the necessary arsenal. Think of it as assembling your very own superhero toolkit, where each item plays a pivotal role in the success of your mission. Here are the tools you’ll need:
- Wrench,
- Screwdrivers,
- Pliers (I have CXGS ones),
- Tim removal tool,
- Panel adhesive.
Also, never underestimate the importance of safety precautions. Donning protective gear like gloves, goggles, and even a dust mask will shield you from potential hazards. Furthermore, choosing a well-ventilated area to work in ensures a breathable atmosphere while keeping your enthusiasm levels high. So, gear up, take a deep breath, and get started.
Assess the Damage and Find the Right Replacement Fender
Although fenders aren’t the common parts that need replacement, it’s definitely good to know a thing or two about the process. Like a detective examining a crime scene, the first step in your replacement journey is to assess the damage and decipher the clues left behind. Take a moment to carefully inspect the affected area, scrutinizing the extent of the dent, scratch, or deformity. Is it a minor blemish that can be easily repaired, or has the component suffered significant structural damage?
Examine the Damaged Fender and Identify the Extent of the Damage
Finding the right replacement part is akin to seeking out the missing piece of a jigsaw puzzle. It needs to seamlessly integrate with the rest of your four-wheeler, both in terms of size and design. Begin your search by consulting your vehicle’s make and model, as this information is essential in identifying compatible fender options. Explore various avenues, such as local auto parts stores, online marketplaces, or even salvage yards, where hidden treasures of automotive components await.
However, remember that aesthetics alone are not enough – functionality matters too. Consider factors such as the material, whether it matches your existing fenders, and if it offers the same level of protection as the original. If you’re unsure about compatibility or need expert guidance, consult with knowledgeable professionals who can help steer you in the right direction.

Proceed With Removing the Damaged Fender
With your tools at the ready and a determined spirit, it’s time to bid farewell to the damaged part and pave the way for a fresh start. Removing the damaged fender is like shedding old skin, clearing the path for a rejuvenated appearance. So, you understand that knowing how to replace the fender liner properly is a must. And with the evolution of four-wheelers, it’s understandable why there are some preparatory steps you definitely should take. Let’s check them out.
Park the Vehicle in a Safe and Suitable Location
Don’t forget to ensure the safety of both yourself and your vehicle. Find a spacious and level area, ideally a garage or a well-lit driveway, where you can comfortably work without any obstructions. Parking the vehicle in a safe and suitable location not only provides you with ample space to maneuver but also minimizes the risk of accidents or damage during the fender replacement process.
Locate and Remove Any Screws, Bolts, or Clips Securing the Fender to the Vehicle
With the vehicle securely parked, begin by inspecting the damaged fender and identifying any screws, bolts, or clips that hold it in place. Pay close attention to the areas where it connects to the vehicle’s body or frame. Carefully loosen and remove each fastener, taking note of their specific locations to ensure smooth reinstallation later.
Then take out the damaged component from the vehicle. Exercise caution and a gentle touch as you carefully pry the fender away from its position. Take care not to exert excessive force or rush through this step, as you want to avoid damaging any surrounding components.

Prepare the Replacement Fender
Although it’s not one of the most expensive vehicle repairs, why not save some bucks and learn something new by taking on this task on your own? Like unwrapping a precious gift, unpack the new part and inspect it for defects. Transfer any components or accessories from the old part, preserving what can be salvaged. Clean and prep the replacement part, peeling away protective coverings and smoothing out imperfections.
This preparatory ritual sets the stage for a seamless transition, ensuring the new fender harmonizes with your vehicle’s aesthetics. The fenders become a sign of change as the expectation builds, ready to make your car look better and protect it from all harm. Embrace the possibilities that lie ahead as you unite the new component with your vehicle, creating a harmonious symphony of style and functionality.

Install the Replacement Part Efficiently
One of your responsibilities as a driver surely is keeping your four-wheeler working perfectly and ensuring it’s safe to drive. That’s why if you decide to make this replacement a DIY project, be sure you do it efficiently. With the preparation complete and the anticipation building, it’s time to pass on the exhilarating phase of replacing fenders: the installation.
This transformative step brings you one step closer to revitalizing your vehicle’s appearance and restoring its protective shield. So, tighten your grip on the tools of your craft, for the time has come to bring form and function together in a symphony of automotive mastery. Let’s check the steps you should take in order to have a safe and efficient installation.
Align the Replacement Fender With the Mounting Points on the Vehicle
As you proceed with the installation of the replacement part, the art of alignment takes center stage. Like a skilled craftsman, your keen eye and steady hand should guide the fender into its place. Aligning fenders with the mounting points on the vehicle requires careful attention to detail.
Ensure that its edges line up precisely with the adjacent body panels and that any holes for screws or bolts are in perfect alignment. Patience and precision are key as you navigate the intricate dance of matching contours and curves, striving for seamless integration.
Secure the Fender in Place Using Screws, Bolts, or Clips
With alignment mastered, it’s time to anchor the replacement component firmly in place. Armed with screws, bolts, or clips, you should proceed with the task of securing the fenders to the vehicle’s frame or body. Each fastener plays a crucial role in ensuring a secure and stable attachment.
Skillfully maneuver your tools, tightening the screws or bolts with the perfect balance of force, ensuring a snug fit without overtightening. The satisfying click or clasp of clips signals that the part is taking root, completing its transformation from a mere replacement part to a steadfast guardian of your vehicle.
Double-Check the Alignment and Fitment of the Fender
As you near the completion of the installation, a moment of reflection emerges – an opportunity to double-check your work and ensure the fenders’ alignment and fitment are flawless. Step back and survey your handiwork, observing the symphony of lines and contours that now adorn your vehicle.
Take a critical eye on the alignment, checking for any discrepancies or gaps that may indicate an imperfect fit. Fine-tune as needed, making minute adjustments to achieve that seamless integration that is the hallmark of a successful replacement.
Finalize the Installation Process
As the final touches of the replacement journey unfold, it’s time to bring the installation to its crowning moment. Test the functionality of any components attached to the fender, like side markers or trim pieces, ensuring that they operate seamlessly. With precision and care, clean the fender and its surroundings, erasing any fingerprints or smudges that may have emerged during the installation process.
As you step back and take in the overall appearance, revel in the transformation that has taken place. Inspect the new part with a discerning eye, ensuring its fit is flawless, and the vehicle’s aesthetics are restored to their former glory. With the installation finalized, the journey reaches its triumphant conclusion, and your vehicle stands as a testament to your skill and dedication.

Follow My Step-by-Step Guide and You’ll Excel in Replacing the Fender
Armed with knowledge, precision, and a touch of creativity, you have transformed your vehicle, breathing new life into its appearance and safeguarding its body. Embrace the sense of accomplishment and the newfound confidence that comes with mastering this essential skill.
As you set on to future automotive endeavors, remember that with each repair, you become a more capable and empowered driver. So, seize the opportunity, excel in replacing fenders, and let your automotive prowess shine. The road awaits, ready to be conquered by your skillful hands and rejuvenated vehicle.


