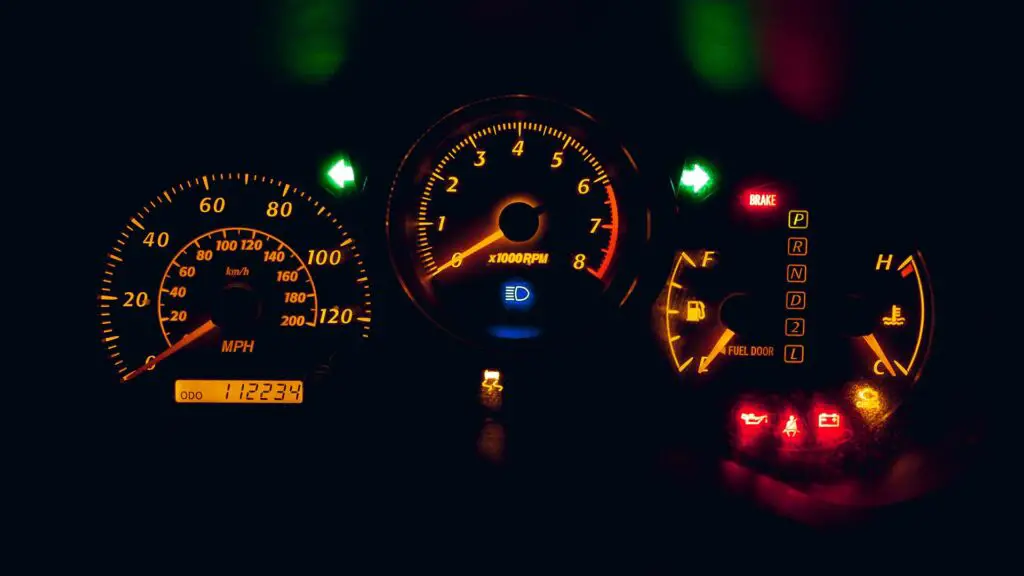
If you love to customize cars, you know the value of monitoring important engine metrics. But how to install boost gauges? After all, this component can give you a convenient way to keep track of turbo pressure and other performance data while adding an aesthetic touch that can truly set your ride apart from the pack. In this step-by-step guide, I’ll show you everything you need to know about installing a boost gauge.
Understandably, there’s a time when you want to give your car some extra flair, but you need all the resources at your fingertips! Installing an AEM boost gauge is a great way to improve your four-wheeler’s performance and monitoring capabilities. My guide will walk you through the process, from mounting the gauge to connecting the wiring harness and testing the gauge. With these comprehensive instructions, you’ll be able to install your AEM boost gauge with ease!
What Are Boost Gauges?
These are instruments used to measure the pressure of air or intake manifold pressure in an engine. They are commonly used in turbocharged or supercharged vehicles to monitor the amount of boost pressure being produced by the forced induction system.
Several types of boost gauges are available in the market, each with unique features and benefits. Here are some of the most common types and their prices:
| Specifications | Price | |
| Auto Meter 8404 Mechanical Boost Gauge | These gauges use a physical sensor to measure the pressure and display it on the gauge face. They are typically more accurate than electronic gauges but require a vacuum or pressure hose to be routed through the firewall. | $94.46 |
| MaxTow Electronic Boost Gauge | These gauges use an electronic sensor to measure the pressure and display it on an LCD screen. They are easier to install than mechanical gauges, but they can be less accurate and may require calibration. | $109.99 |
| GlowShift Digital Boost Gauge | This gauge uses a microprocessor to measure and display the boost pressure. It’s specifically designed to monitor boost pressure and vacuum compression levels in turbo or supercharged car engines. | $89.99 |
Why Are They Important for Your Car?
These components provide real-time information about the engine’s performance, specifically the amount of boost pressure being produced by the forced induction system. By monitoring the boost pressure, drivers can ensure that their vehicle is operating at optimal levels and make any necessary adjustments to their driving habits or vehicle tuning.
Boost gauges also help drivers overcome driving stress as well since these components can detect any issues with the forced induction system, such as leaks or malfunctions, before they cause serious damage to the engine. This helps drivers prevent costly repairs and extends the life of their vehicles.
In short, they are an essential tool for any driver who wants to maintain their car’s performance, improve fuel efficiency (but ensure you know how to test the fuel pressure regulator), and ensure the longevity of their engine.

Step-by-Step Guide on How to Install Boost Gauges
If you’re looking to improve your vehicle’s performance and monitoring capabilities, installing a boost gauge is a great place to start. They measure the pressure of air or intake manifold pressure in an engine, providing real-time information about the engine’s boost pressure. With this information, drivers can adjust their driving habits and make any necessary adjustments to their vehicle’s tuning to ensure optimal performance.
In this step-by-step guide, I’ll walk you through the process of how to install AEM boost gauges. Whether you’re a seasoned car enthusiast or a beginner looking to make some improvements, my guide will provide you with all the needed information and take your driving experience to the next level.
Gather the Necessary Tools and Materials
First things first – have all the needed equipment for your DIY car improvement. To make things easier, here are things I have at home, and I’ll put the brands you can get online.
- AEM boost gauge – I got WATERWICH 35 PSI Turbo Boost for my four-wheeler,
- Boost gauge wiring harness – AUTO METER 2198 Universal Gauge Wire Harness has the best ratings,
- Boost hose – Auto Meter 3223 Nylon Tubing,
- T-fitting – Brass Barb Tee Fitting,
- Vacuum hose – EVIL ENERGY Tubing Hose,
- Electrical tape – AmazonCommercial Electrical Tape,
- Wire cutters and strippers – WGGE Wire Stripper,
- Pliers – Cartman 39 Piece Cutting Plier Tool Set,
- Screwdriver set – ROTATION 6PCS Magnetic Tip Screwdriver Set,
- Wrench set – Amazon Basics.
Ensure you have all the required tools and materials before starting the installation process. Having everything on hand will save you time and ensure a smooth installation process. If you’re missing any tools or materials, purchase them before starting the installation.

Choose the Location for the Boost Gauge
The gauge should be mounted in a location that is easily visible to the driver while driving. Some popular mounting locations include the dashboard, A-pillar, or center console. When choosing a location, consider the following factors:
- Visibility – Make sure the gauge is easy to read and not obstructed by the steering wheel or other instruments.
- Accessibility – The gauge should be easily accessible for adjustments and maintenance.
- Aesthetics – The gauge should be mounted in a location that looks good and complements the interior of the vehicle.
Mount the Boost Gauge in the Chosen Location
Now that you’ve chosen a suitable location for your boost gauge, it’s time to mount it in place. Here’s how to do it:
- Place the gauge into the gauge pod or bracket that will hold it in place.
- Align the mounting holes on the gauge with the holes on the bracket.
- Insert the screws with the gauge into the holes and make sure that you have tightened them down using a screwdriver or wrench. Make sure the screws are tight enough to hold the gauge securely in place.
- If mounting the gauge to the dashboard or center console, you may need to drill holes for the screws. Use a drill bit slightly smaller than the screws to prevent damage to the dashboard or console.

Install the Boost Pressure Sensor in the Engine Compartment
Installing the boost pressure sensor in the engine compartment is an important step in the installation process. Here’s how to do it:
- Locate the intake manifold on the engine. This is where the boost pressure sensor will be installed.
- Remove any existing components from the location where you plan to install the sensor, if necessary.
- Insert the boost pressure sensor into the intake manifold. Use the appropriate fittings and adapters to connect the sensor to the manifold.
- Make sure the sensor is securely installed and tightened down. Use a wrench to tighten the sensor in place.
- Once the sensor is installed, connect the boost hose to the sensor. Use the appropriate fittings and clamps to ensure a tight seal.
- Route the other end of the boost hose to the boost gauge location. Use the T-fitting to connect the hose to the gauge.
Connect the Boost Pressure Sensor to the Boost Gauge With a Vacuum Hose
Connecting the boost pressure sensor to the boost gauge with a vacuum hose is a crucial step in the installation process. Here’s how to do it:
- Locate the vacuum line that runs from the engine to the intake manifold. This is where the vacuum hose will be connected.
- Cut the vacuum line in half using a pair of pliers. Use a sharp blade to make a clean cut.
- Insert the T-fitting into the cut line. Make sure the T-fitting is facing in the correct direction.
- Use the pliers to secure the T-fitting in place. Make sure it’s tight and won’t come loose.
- Attach one end of the vacuum hose to the T-fitting. Use a hose clamp to secure the connection.
- Attach the other end of the vacuum hose to the boost pressure sensor. Use a hose clamp to secure the connection.
- Route the boost hose to the boost gauge location. Use the T-fitting to connect the hose to the gauge.
Connect the Boost Gauge Power and Ground Wires to the Vehicle’s Electrical System
Although it can sound like something too complicated, connecting the boost gauge power and ground wires to the vehicle’s electrical system actually is a simple process. Here’s how to do it:
- Locate a suitable power source for the boost gauge. This should be a switched power source, such as the ignition switch.
- Use the wire cutters and strippers to remove a small section of insulation from the power wire.
- Connect the power wire to the power source using a wiretap or soldering iron. Make sure the connection is secure and won’t come loose.
- Locate a suitable ground point for the boost gauge. This should be a clean, unpainted metal surface on the vehicle’s chassis.
- Use the wire cutters and strippers to remove a small section of insulation from the ground wire.
- Connect the ground wire to the ground point using a screw or bolt. Make sure the connection is secure and won’t come loose.
- Use electrical tape to wrap the exposed wires and protect them from damage.
As you can see, the process of installing isn’t such a big deal, especially if you’ve already replaced a valve stem and other more demanding repairs.

When You Are Done Test the Boost Gauge to Ensure Proper Installation
Once you have completed the installation process of your boost gauge, it’s important to test it to ensure it was properly installed. Start the engine and allow it to idle. Check the boost gauge to make sure it’s displaying the correct readings. Revise the engine and make sure the gauge is responding accurately to changes in boost pressure.
If you notice any issues with the gauge or the readings, double-check all the connections and wiring. It’s always better to fix any issues right away than to risk damage to your engine or other components. Once you’ve confirmed that the boost gauge is working properly, adjust any settings to your preferences and take your newly improved vehicle for a test drive. Enjoy the benefits of having a boost gauge, including improved performance and monitoring capabilities!

Check Out Some Useful Tips for Installing Boost Gauges
Installing a boost gauge can seem like a daunting task, especially if you’re new to working with automotive electrical systems. However, with the right tools, materials, and instructions, you can install a boost gauge in your vehicle with relative ease.
From choosing the right location for the gauge to testing it after installation, these tips will help you avoid common mistakes and ensure that your boost gauge is installed correctly. Whether you’re a seasoned car enthusiast or a beginner looking to make some improvements, these tips will provide you with the guidance you need to install your boost gauge and enjoy the benefits of improved performance and monitoring capabilities.
Choose a Location That Is Easily Visible to the Driver
It’s important to choose a location for the boost gauge that is easy to see and read while driving. Popular mounting locations include the dashboard, A-pillar, or center console.
Use High-Quality Materials and Connectors to Prevent Leaks
To prevent leaks and ensure a secure installation, use high-quality materials and connectors when installing your boost gauge. Invest in quality hoses, fittings, and clamps to ensure a tight seal.
Follow the Manufacturer’s Instructions Carefully
Boost gauges can vary in terms of installation requirements, so it’s important to carefully follow the manufacturer’s instructions. This will ensure that you install the gauge correctly and prevent any damage to your engine or other components.
Ensure the Boost Gauge Matches the Vehicle’s Boost Pressure Range
Before purchasing a boost gauge, make sure it matches your vehicle’s boost pressure range. Using a gauge that isn’t compatible with your vehicle can result in inaccurate readings and potentially cause damage to the engine.
Master the Art of AEM Boost Gauge Installation
Now that you know how to do it feel free to get creative with it. Don’t be afraid to personalize the installation and make it your own. There is no right or wrong way to show off your car as long as you keep safety in mind and follow some basic installation steps.
Once it’s done, sit back and enjoy your new ride’s added performance, convenience, and style. Remember, knowledge is power, and having an accurate readout of boost pressure is key when tuning for optimum performance. A boost gauge can become a great feature in any car build if done right.


